Launching your catalog on Shein is simple with M2E Shein Connect. The app links your Shopify store to Shein’s marketplace and keeps product and order data synchronized in real time.
This guide outlines the setup steps required to get started.
Step 1. Install the integration app #
Begin the setup by installing M2E Shein Connect from Shopify’s App Store:
1) Go to the app’s official listing page.
2) Click the Install button and confirm any required permissions.

Once installed, the system will redirect you to the configuration panel within the app.
ℹ️️ Register on Shein and get a 30-day free trial of M2E Shein Integration and 0% commission on Shein for 30 days. Choose your region.
Step 2. Connect your Shein seller account #
Your Shopify store is already recognized as the primary catalog source. Now, connect your Shein seller account to begin syncing product and order data.
To do this:
1) Navigate to the Dashboard tab.
2) Click Connect Marketplace Account.
3) When prompted, authorize access.

ℹ️ If you don’t have a Shein seller account yet, follow our registration guide for Europe.
After connecting, you’ll see a progress checklist referred to as the Setup Guide. It helps you track completed steps and what’s still pending.
Step 3. Match Shopify products to existing Shein listings #
If your products are already live on Shein, the app will try to automatically detect and pair them with your Shopify items using SKUs or Product IDs.
If some items are not matched:
1) Click View Not Linked Products in the Link Products section.

2) The app will redirect you to the Listings page.
3) Manually link unmatched items one by one (if you only have a few listings). For a larger catalog, use the bulk import/export option via CSV file.
⚠️ Only linked products will be synchronized. Make sure all relevant Shopify and Shein items are matched.
💡 Need assistance linking products manually? Refer to this guide.
Step 4. Enable inventory synchronization #
Once products are linked, it’s time to activate automatic updates. When enabled, your stock levels and product info will update on Shein whenever changes occur in Shopify.
Here’s how:
1) Go to the Synchronize Inventory step in the Setup Guide.
2) Click View Not Synced Products.
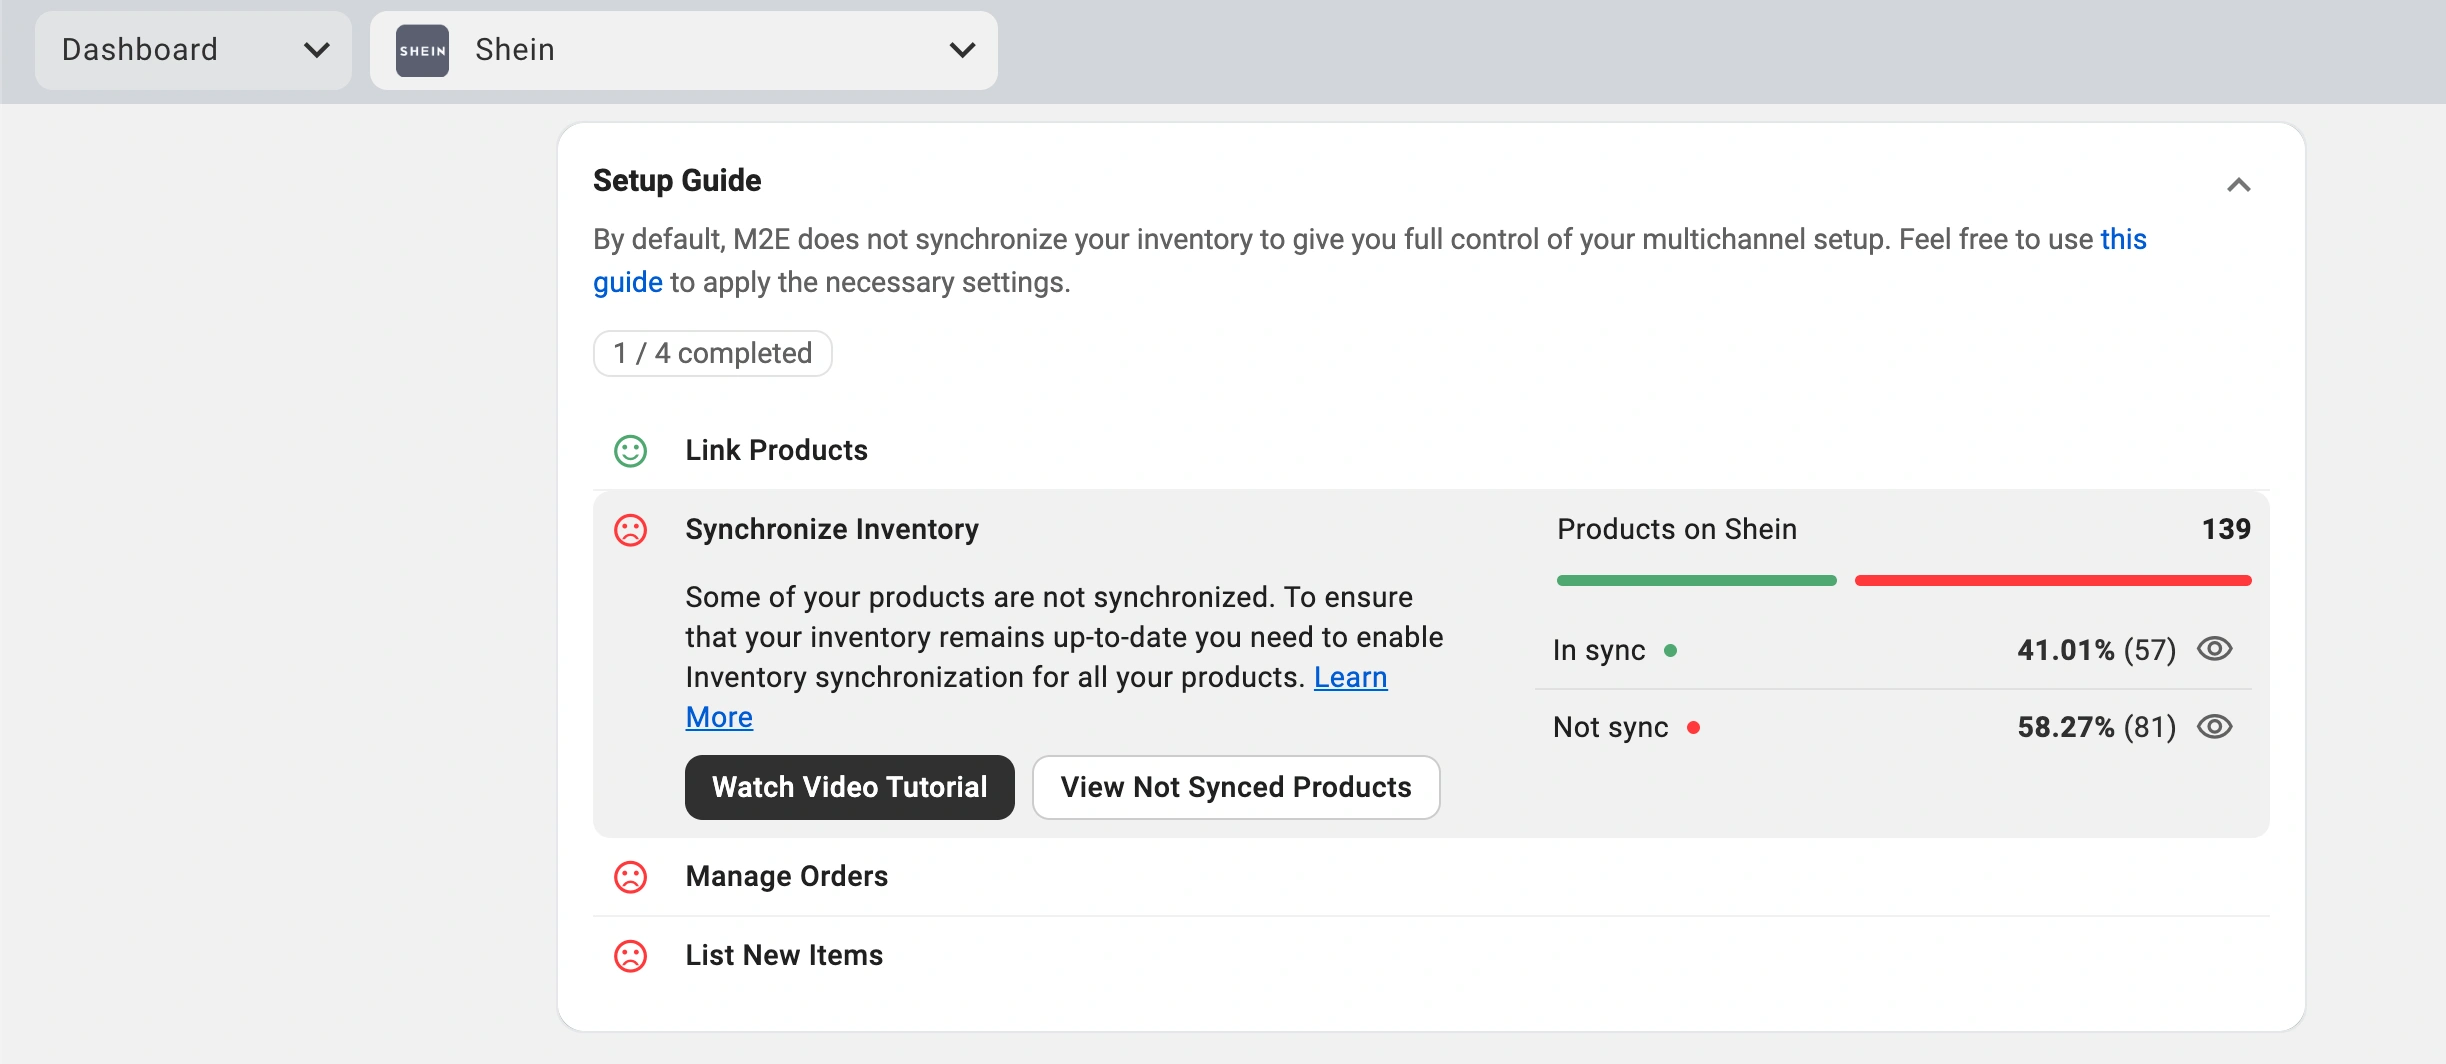
3) Select items to sync – either individually or in bulk.
💡 For a detailed walkthrough, see the full inventory sync tutorial.
Step 5. Adjust order settings #
Now configure how M2E Shein Connect should process incoming orders:
1) Under Manage Orders, go to Order Settings.
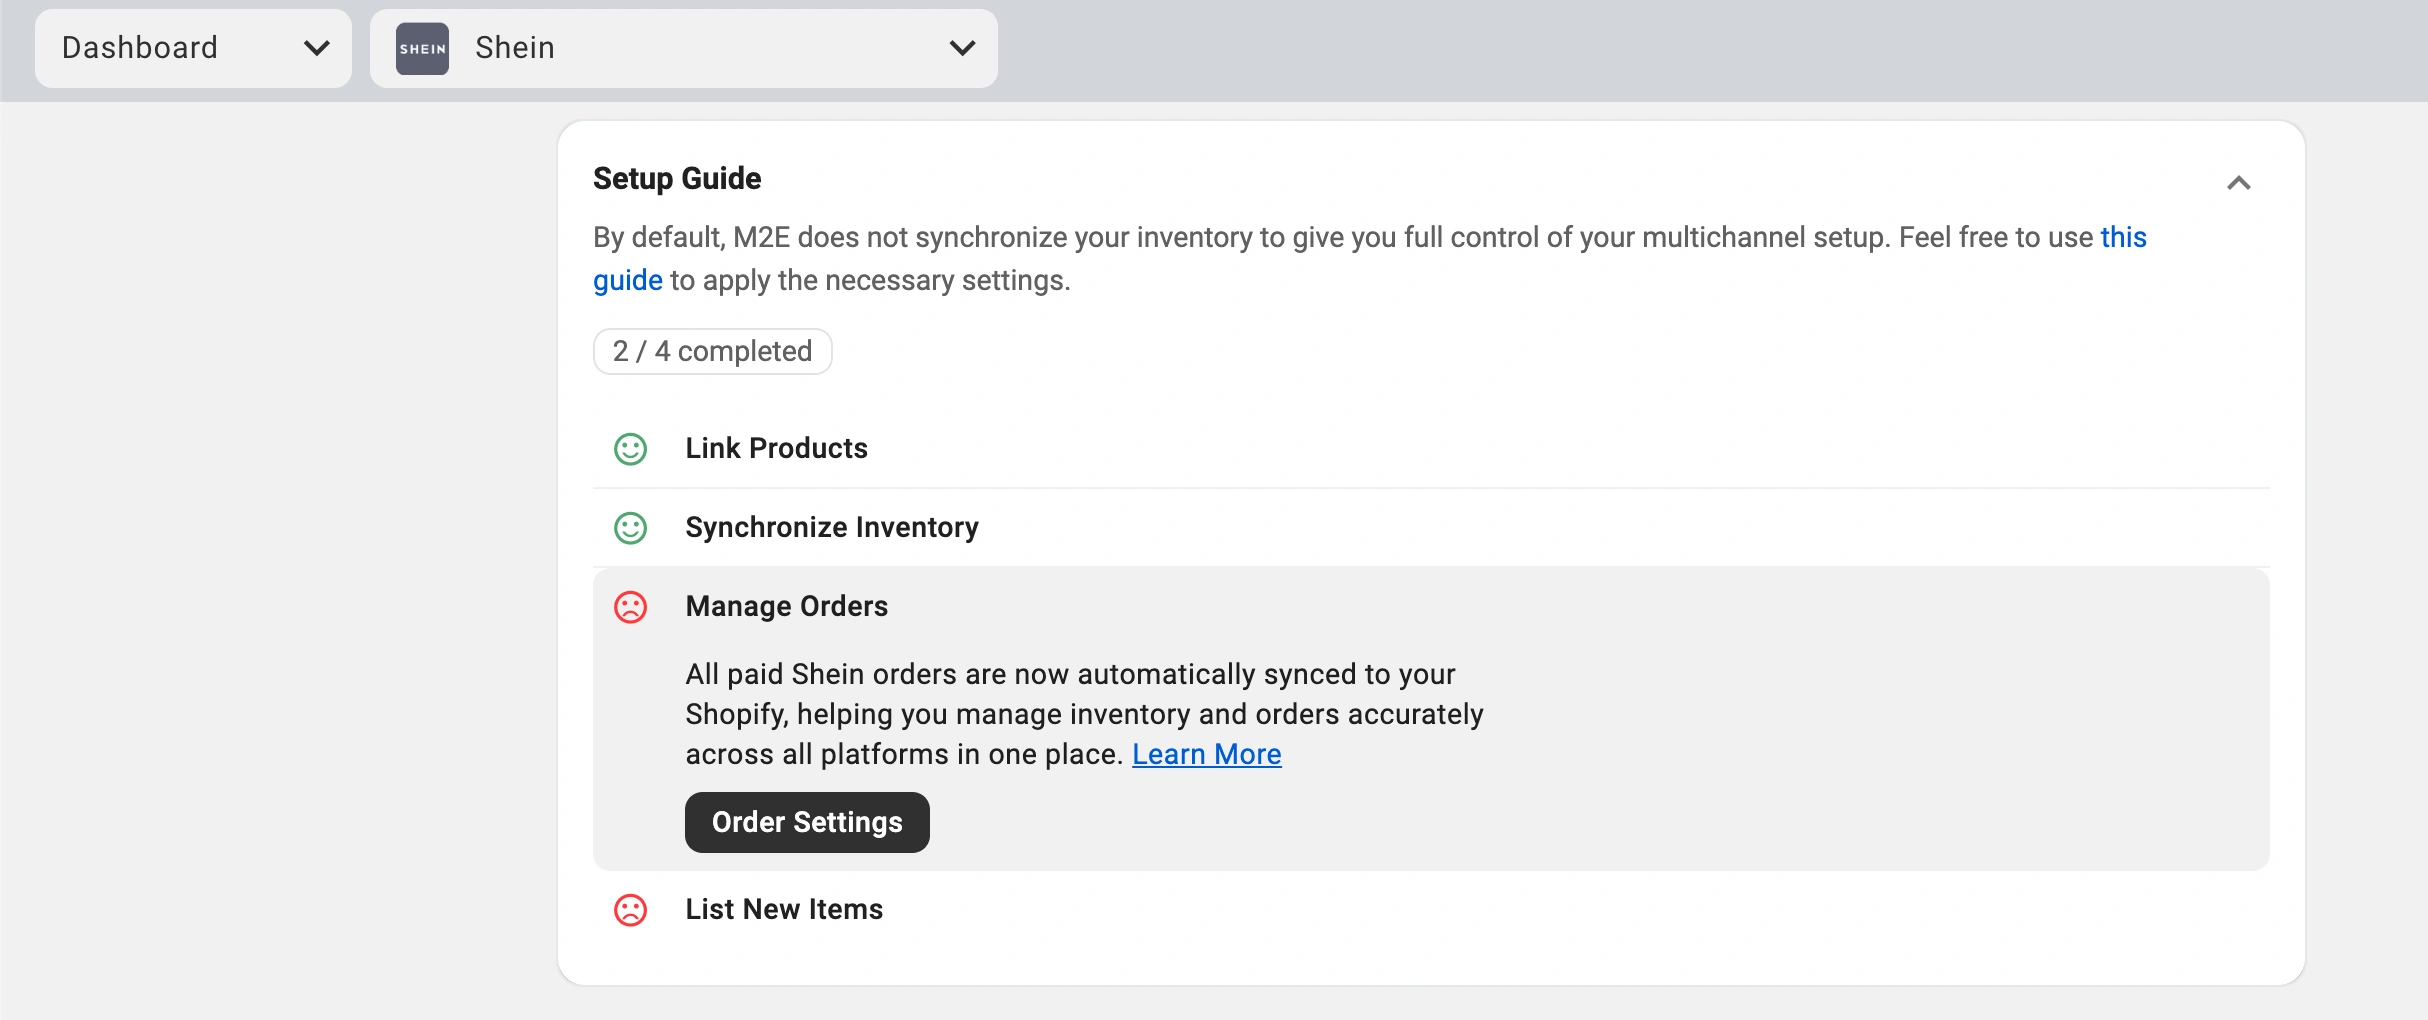
2) Enable the option to Create Shein Orders in Shopify.
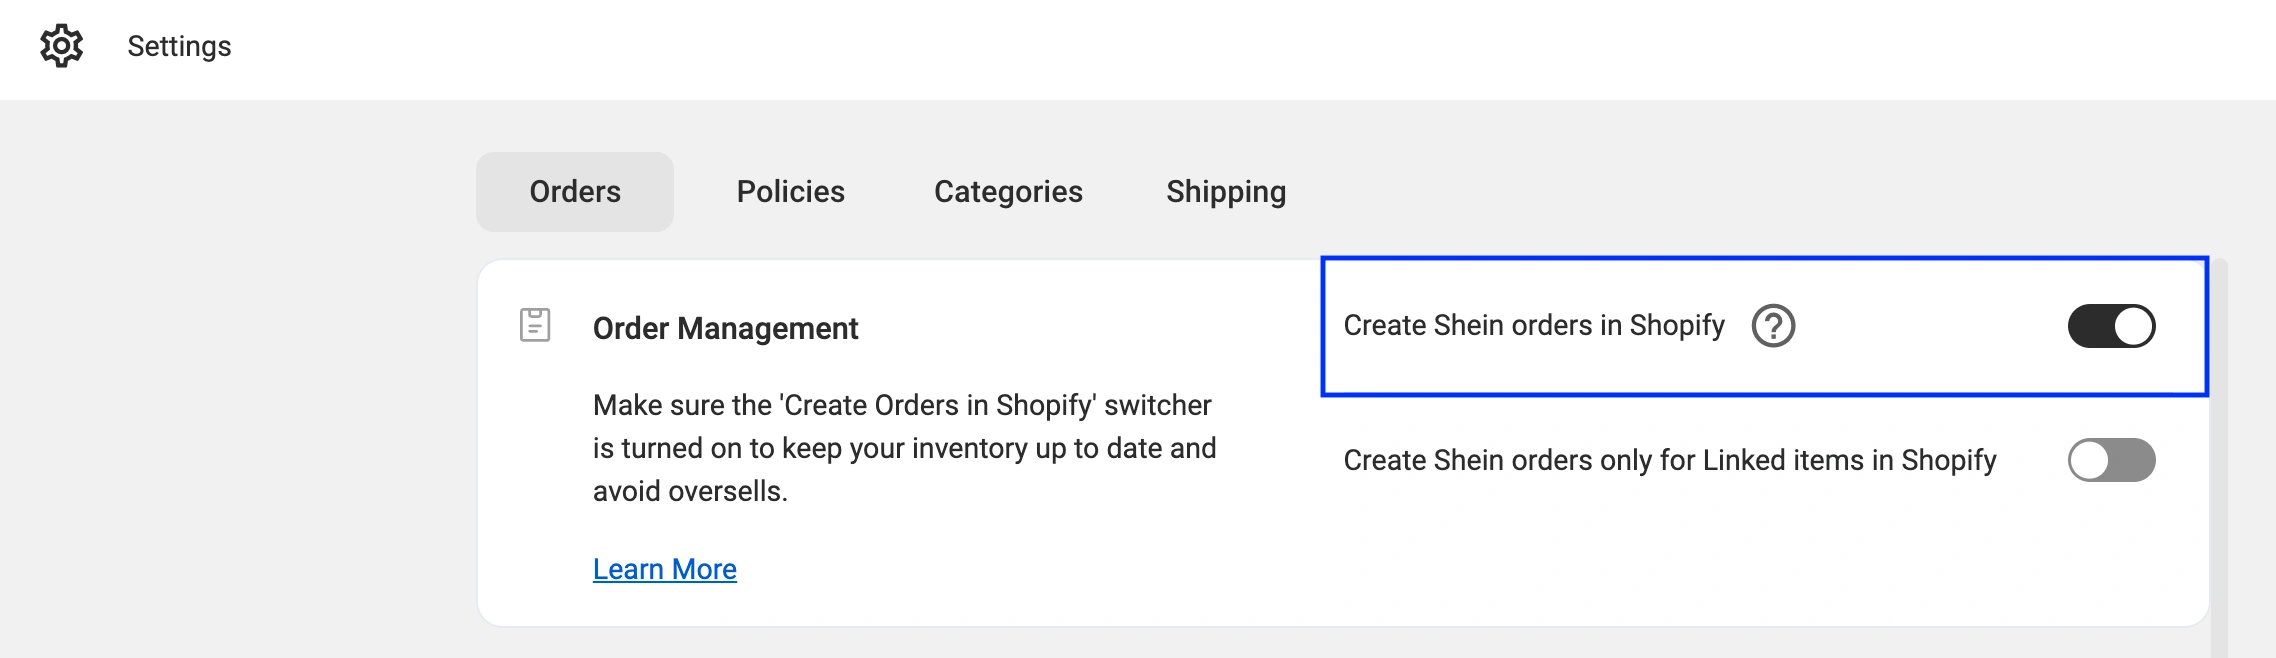
This step ensures each sale on Shein appears as a new order in your Shopify dashboard, allowing for accurate inventory tracking and centralized order management.
⚠️ If this setting is disabled, Shein orders won’t affect Shopify stock, which may result in overselling.
💡 Learn more about all available order settings here.
Step 6. List Shopify products on Shein #
If some of your Shopify items are not yet on Shein, you can publish them via the M2E app:
1) Open the List New Items section in the Setup Guide.
2) Click List on Shein to start the listing process.
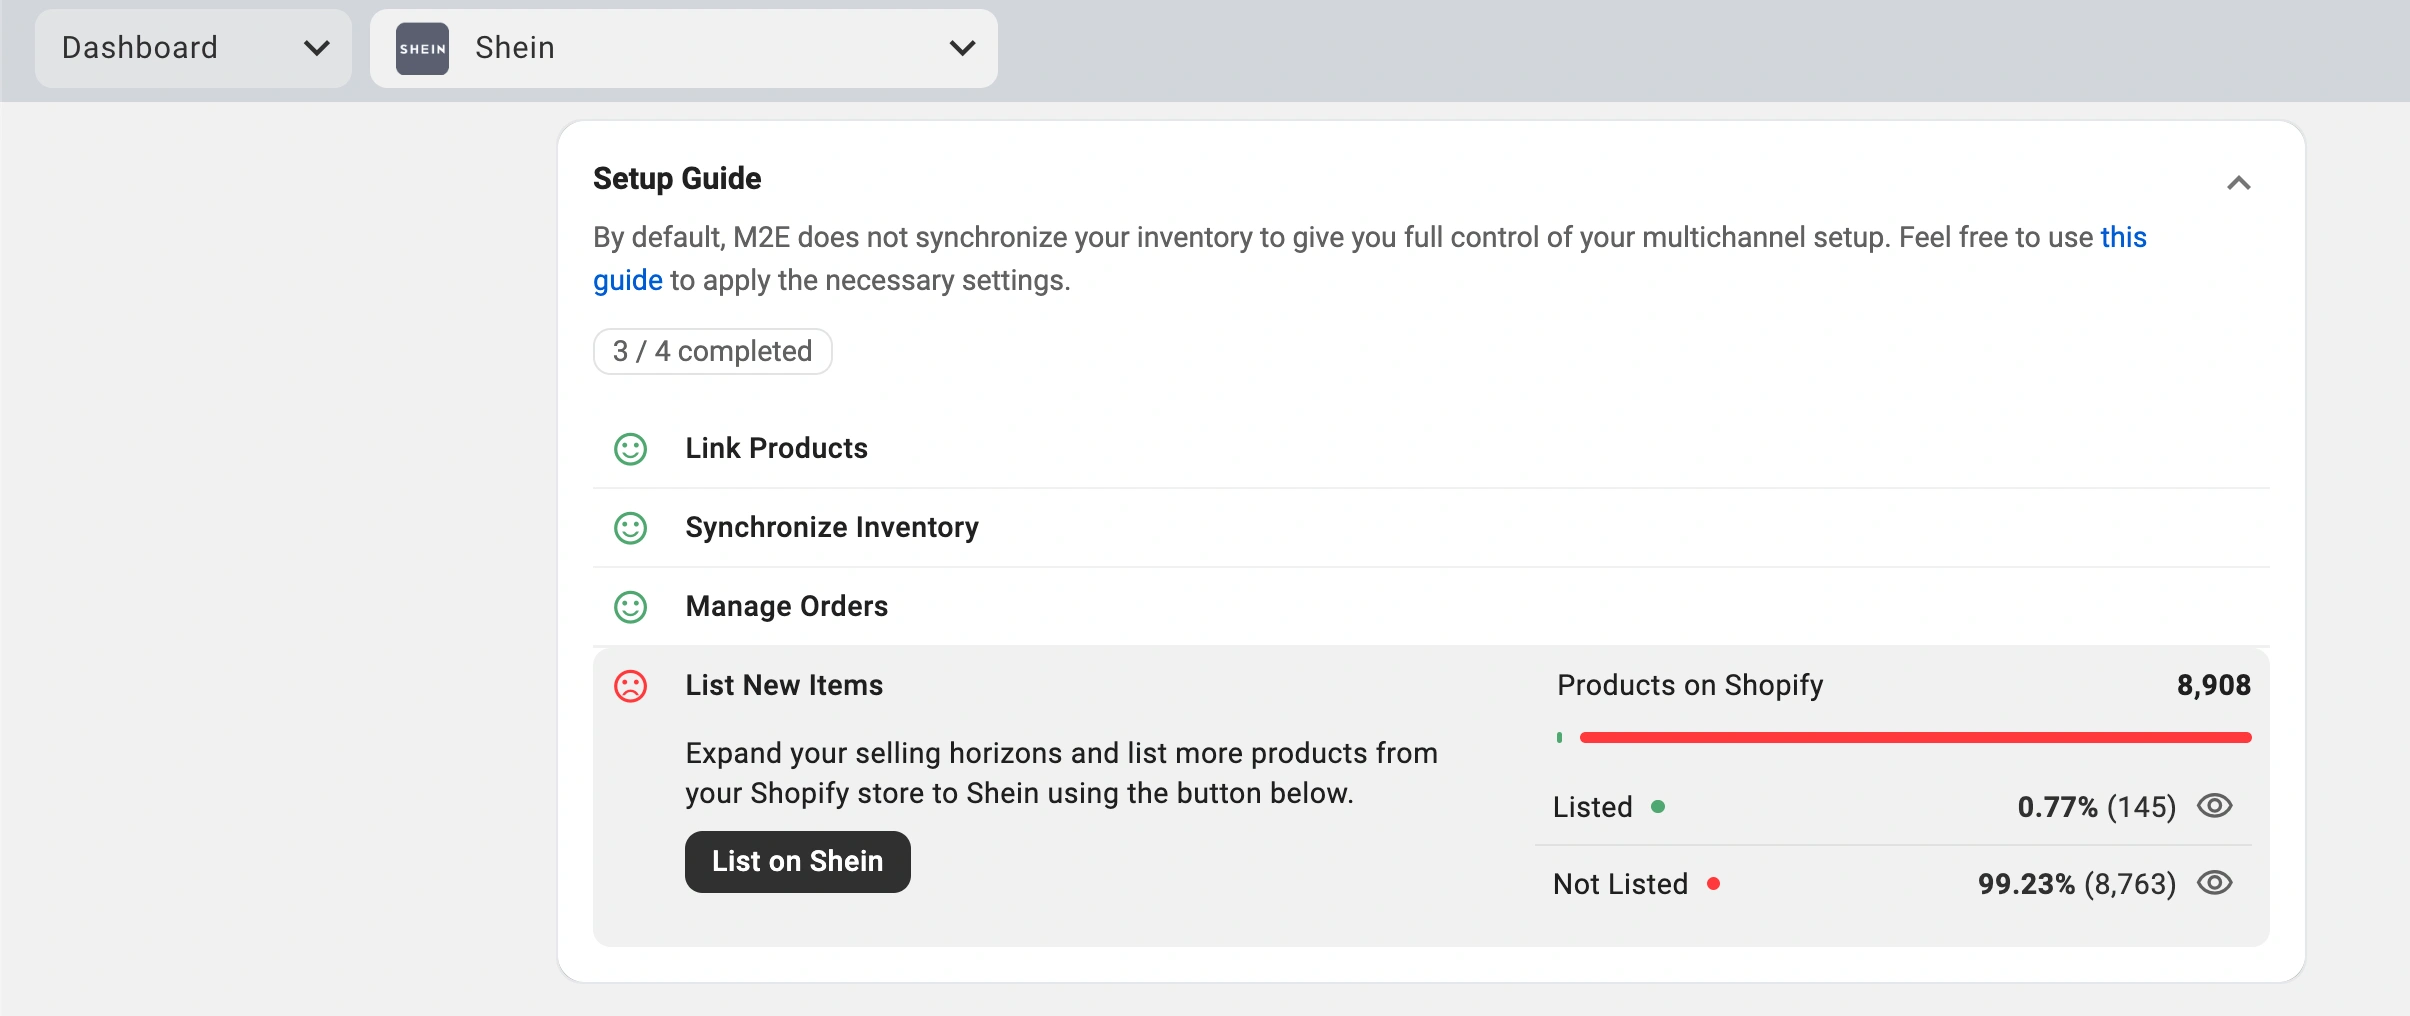
3) Follow the on-screen prompts to submit the listings.
ℹ️ Explore the list of categories available to Shein sellers in Europe.
Your Shopify store is now integrated with Shein. Products are linked, inventory sync is live, and order management is centralized. The M2E Shein Connect app works in the background so you can focus on scaling your business.


