Marketplaces may require product information that isn't available in your store data source. M2E Catalog custom attributes let you add this information, so you don’t need to create new Shopify metafields or attributes in your store.
In this guide, you will learn how to add custom attributes in the M2E Catalog and how to assign attribute values to your store products.
Why use M2E Catalog custom attributes #
M2E Catalog custom attributes:
- Store marketplace-specific data separately from your online store
- Don't affect product information in your storefront
- Work with both Simple and Variational products
- Allow different attribute values for each product variation
- Are easy to manage across large catalogs using CSV import
Example use case:
You are listing products on TikTok Shop, and the marketplace requires Quantity per Pack. This information doesn’t exist in your store, but it is mandatory for listing.
Instead of creating a new store attribute or metafield, you can add a custom attribute in M2E Catalog, assign values, and use it during listing creation.
Create a custom attribute #
To add a new custom attribute in M2E Catalog:
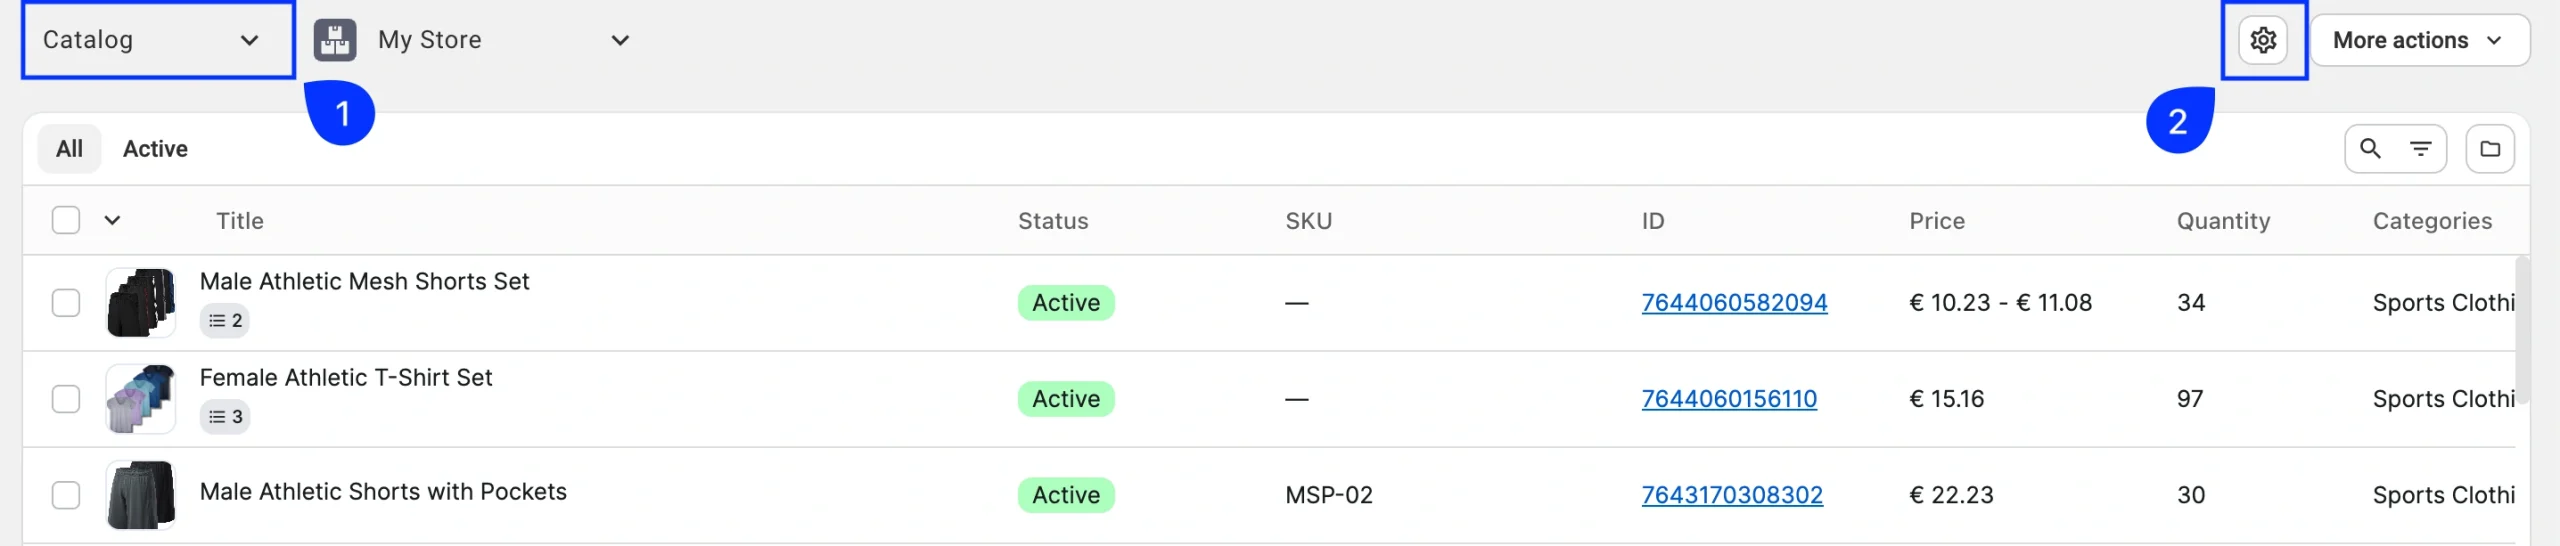
1) Open the Catalog page in M2E Multichannel Connect. It contains all products imported from your store.
2) Click the Settings (gear) icon in the top-right corner.
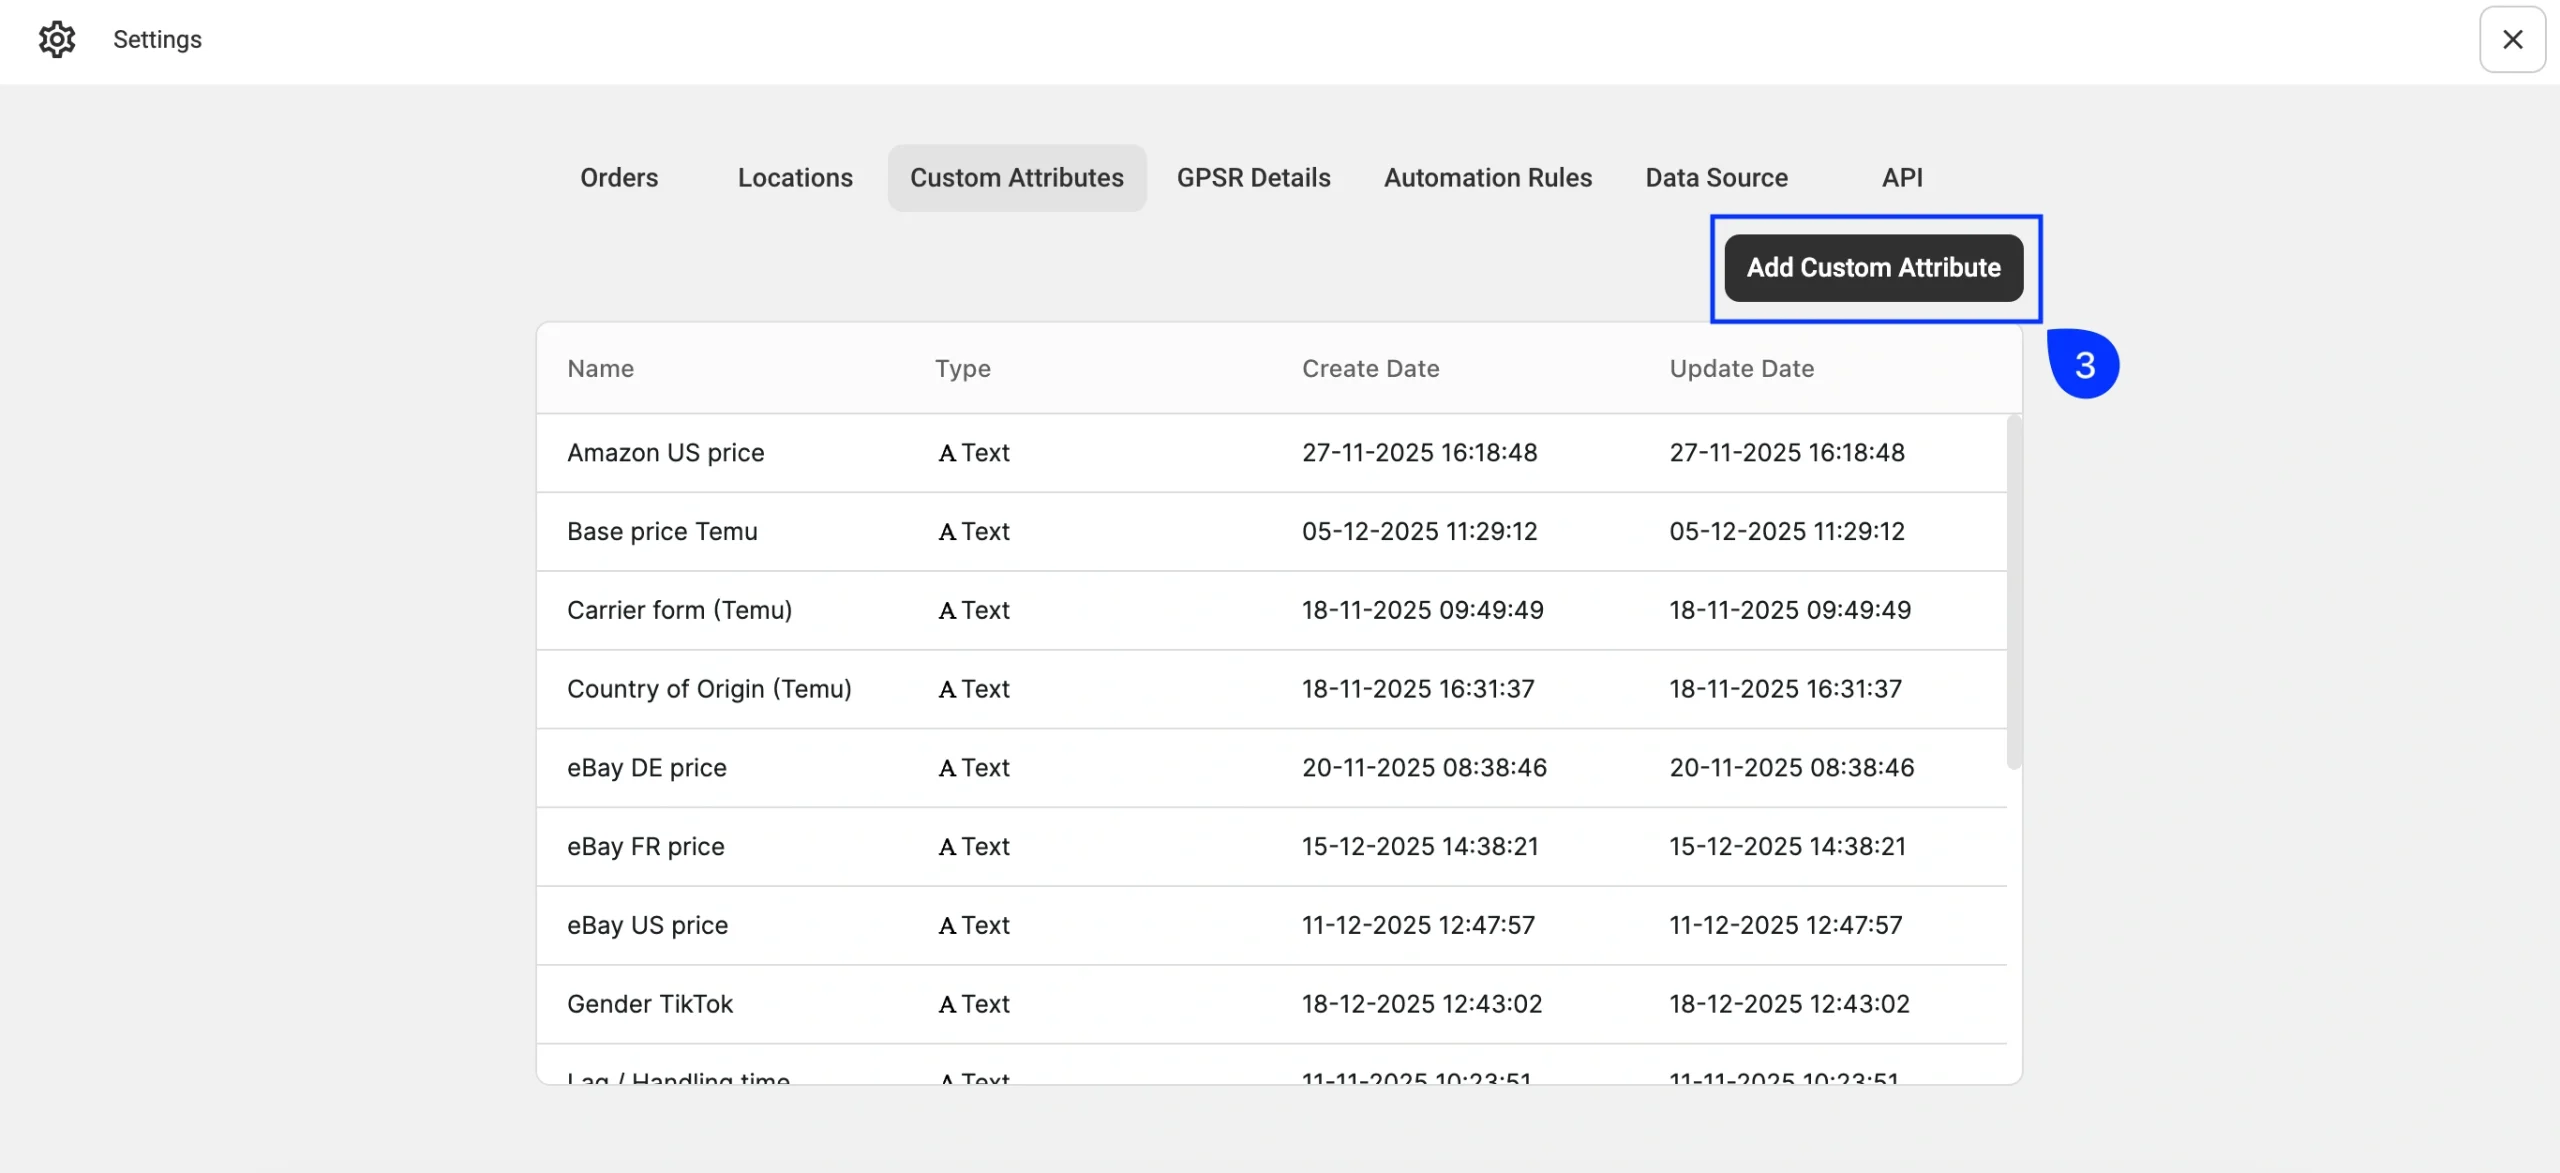
3) Click Add Custom Attribute.
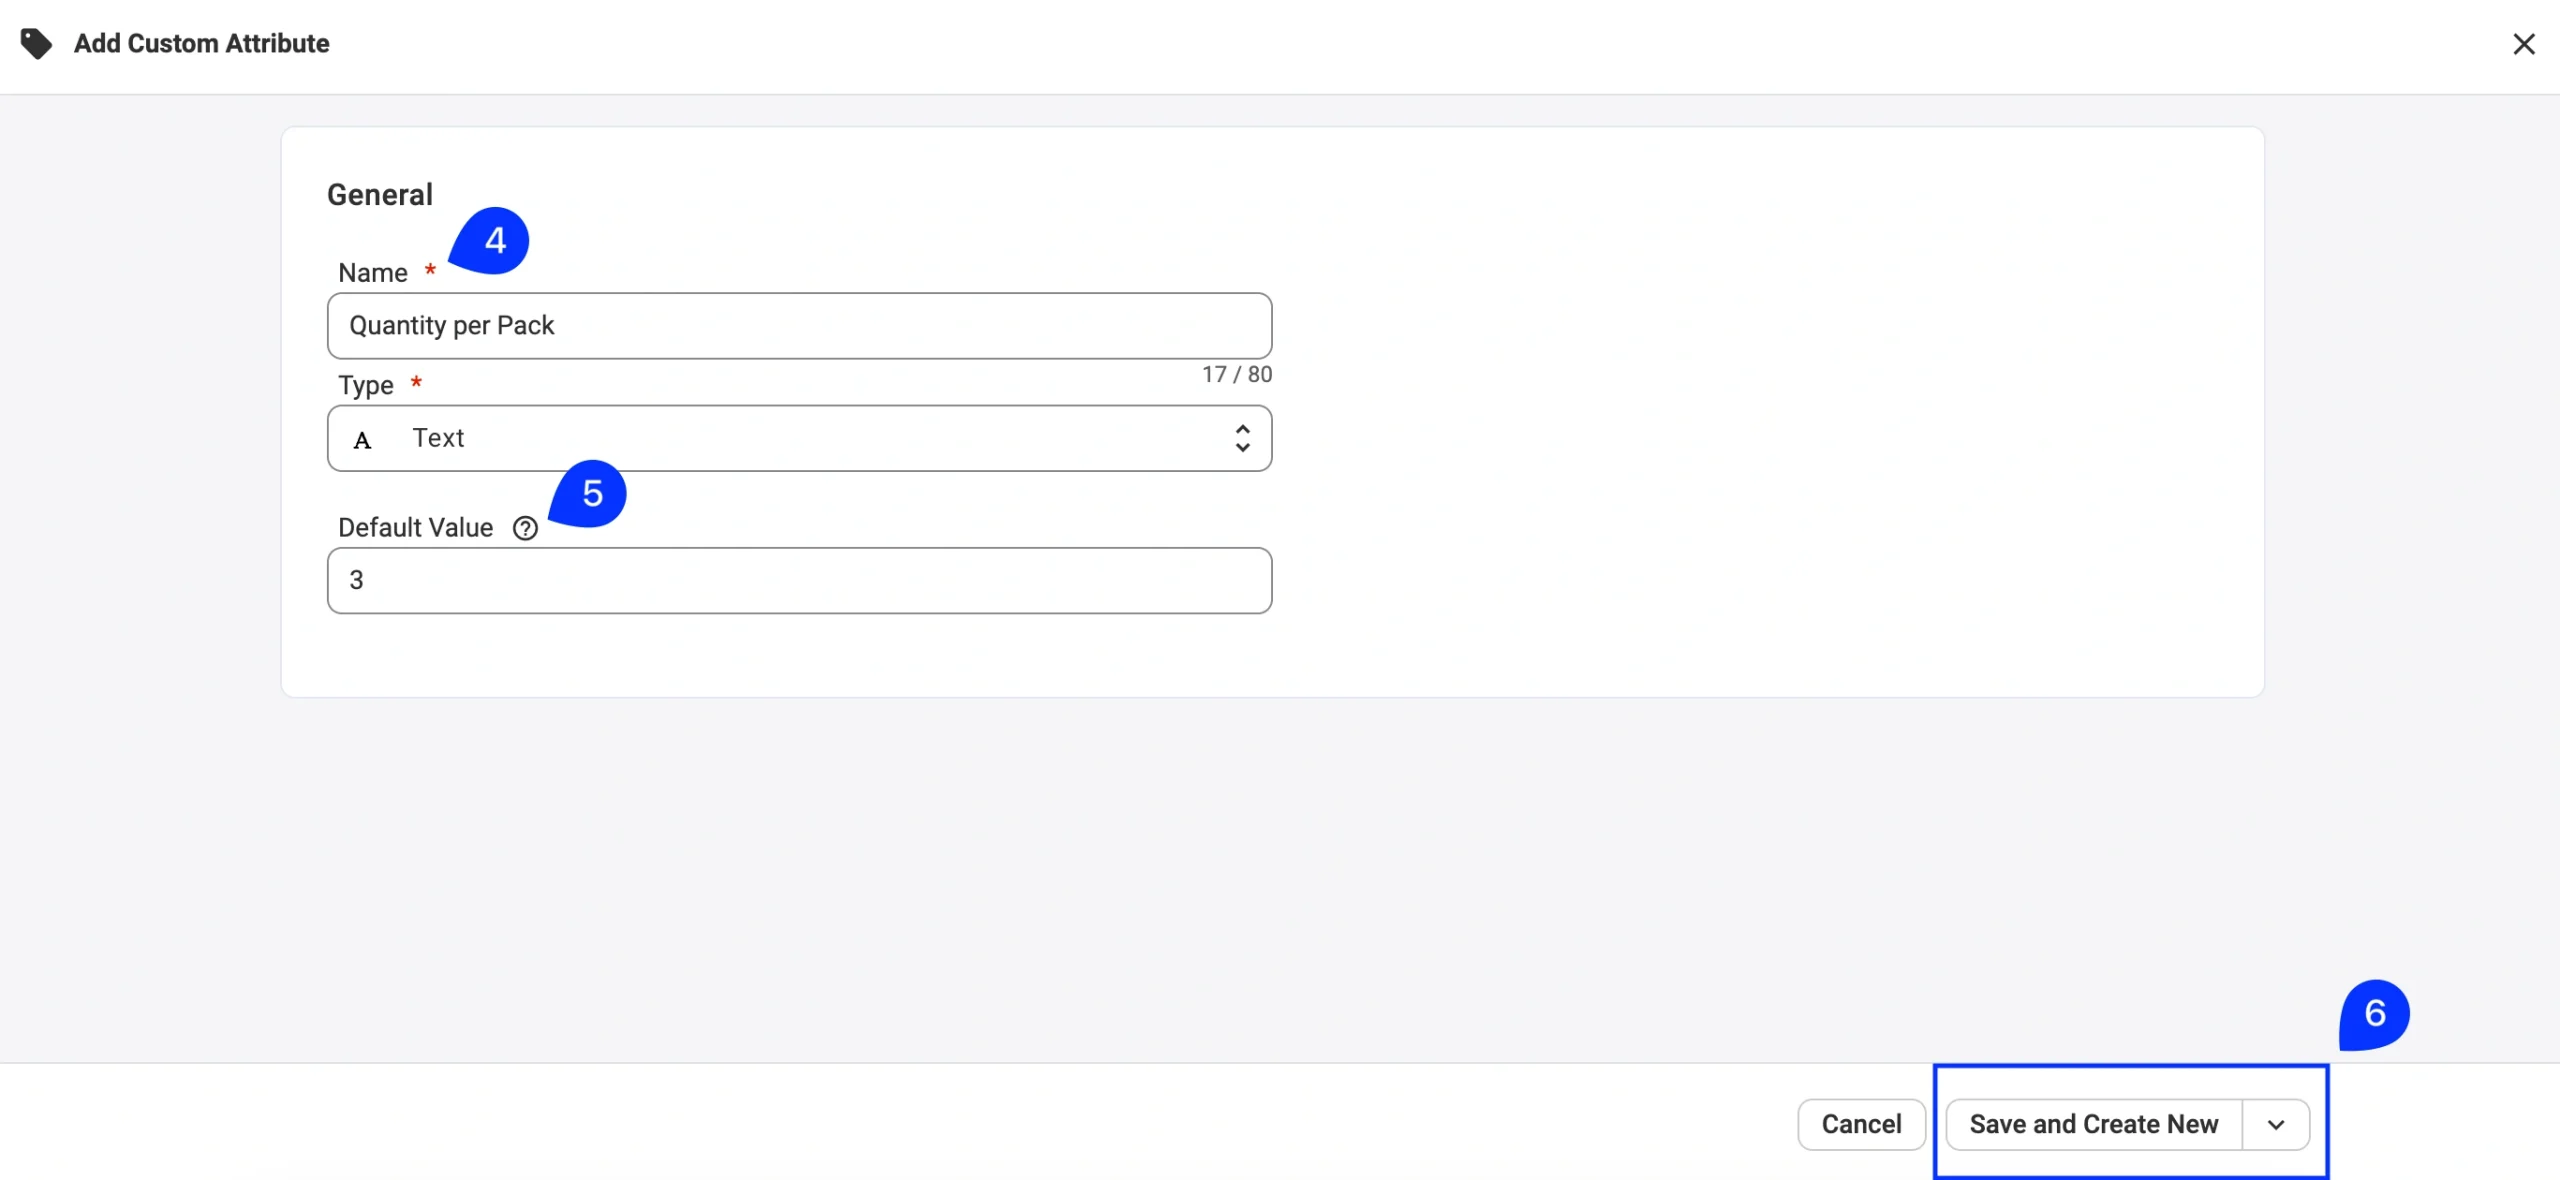
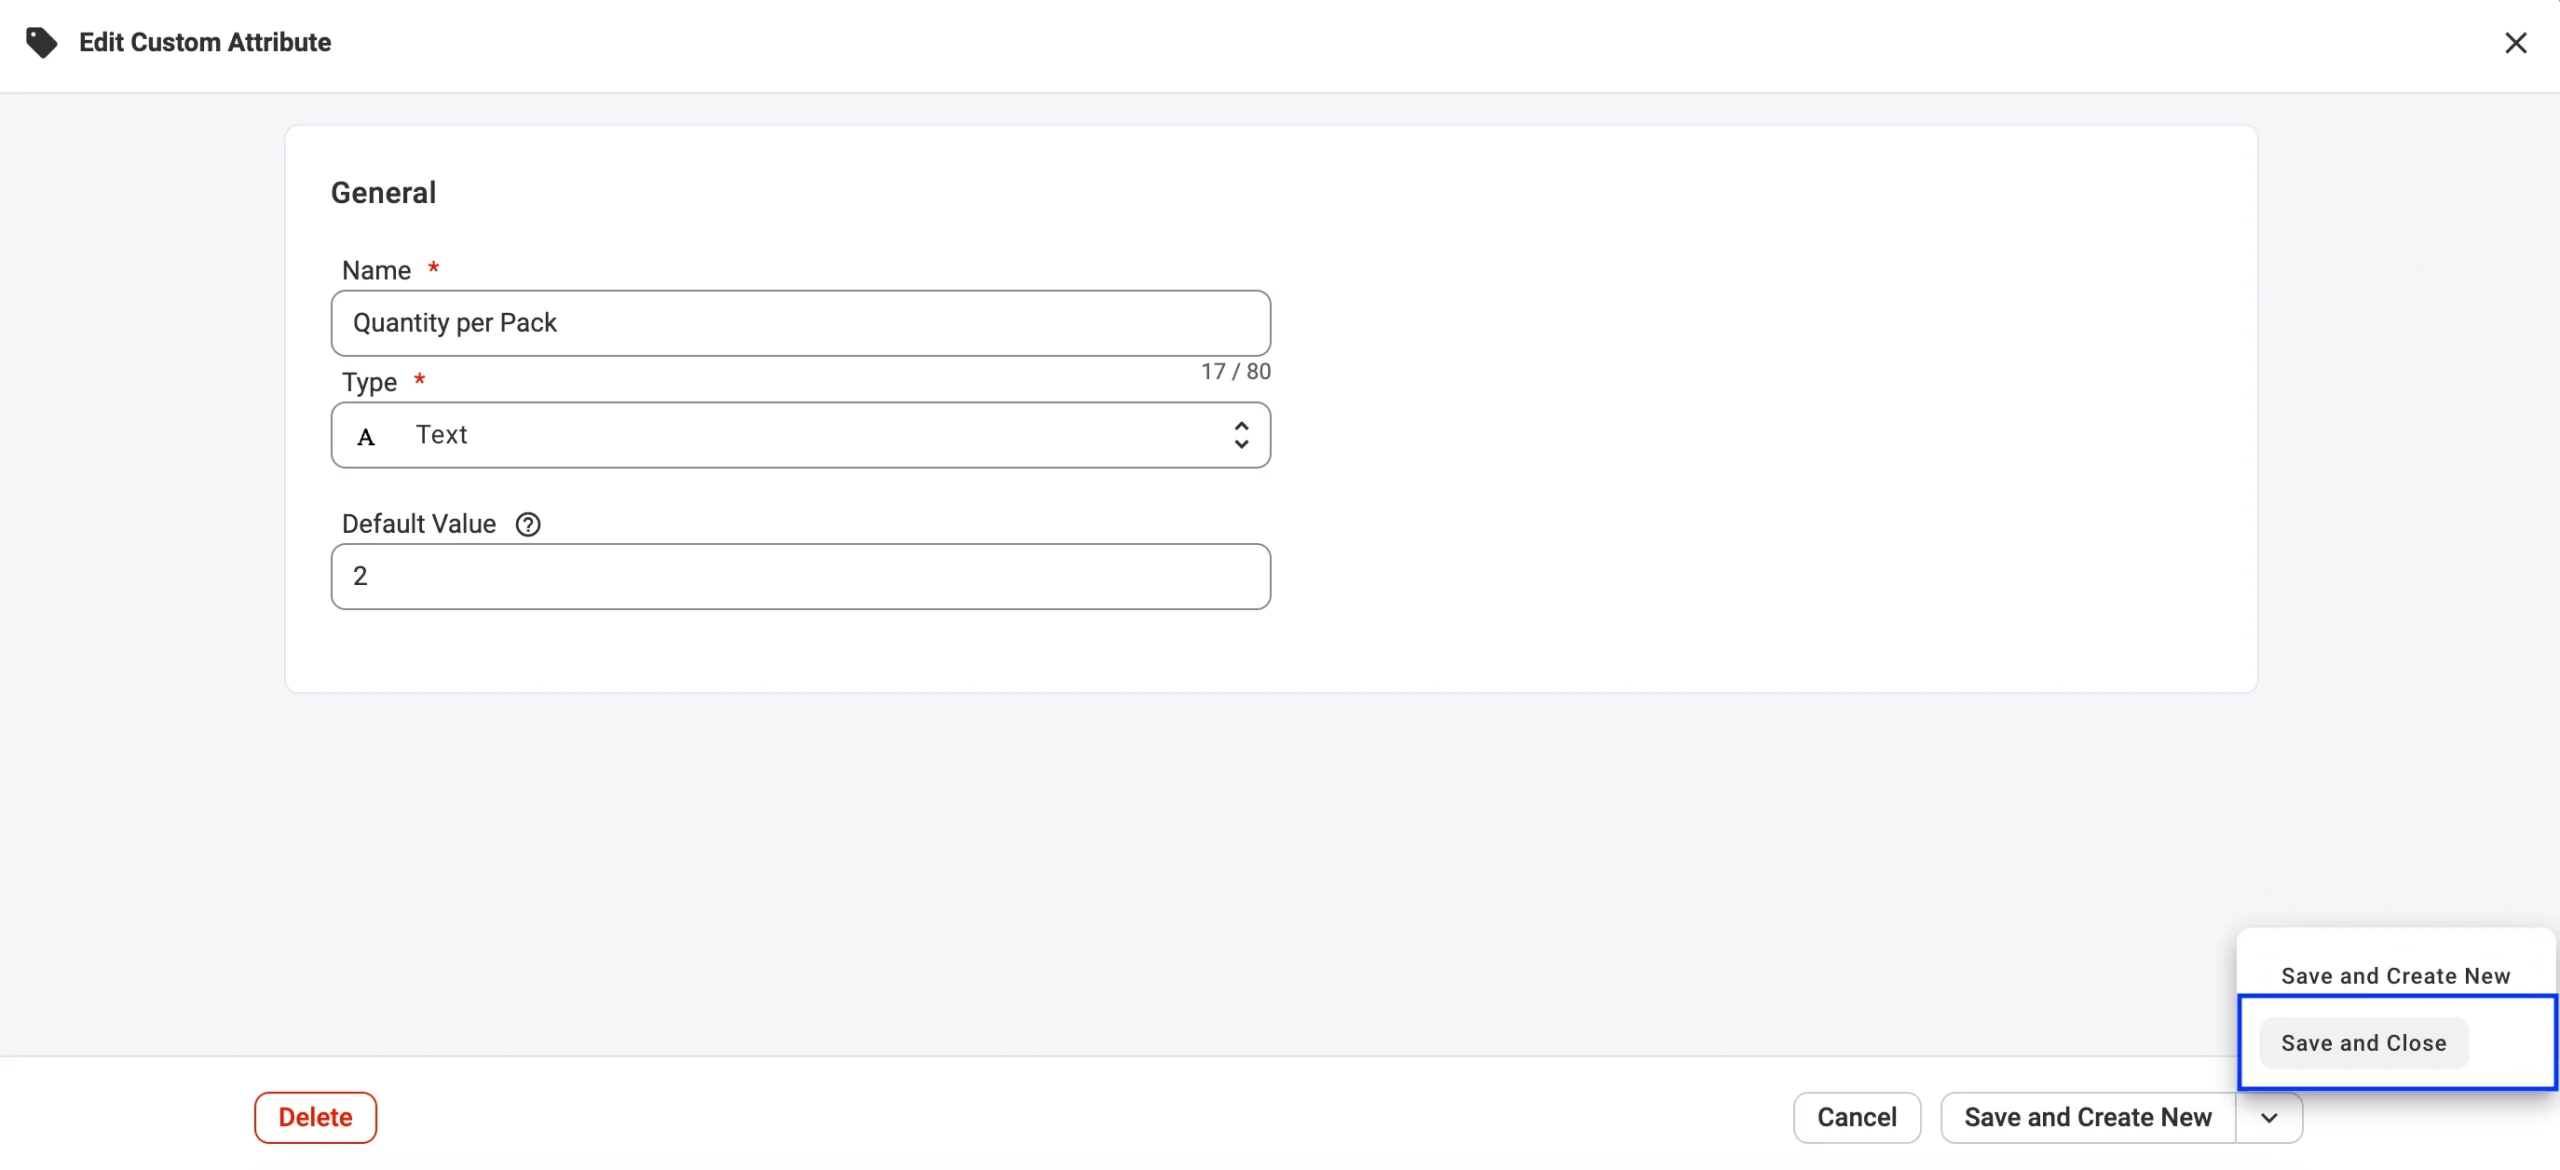
4) Enter the attribute name (for example, Quantity Per Pack).
5) Enter the Default Value. This value will be automatically assigned to all catalog products.
✅ If you have a large catalog and this value differs for most products, leave the default value empty. It gives you more flexibility when assigning values later.
6) Click Save and Create New.
The custom attribute is now available in your M2E Catalog.
Assign custom attribute values to products #
There are three ways to assign or update custom attribute values, depending on your workflow and catalog size.
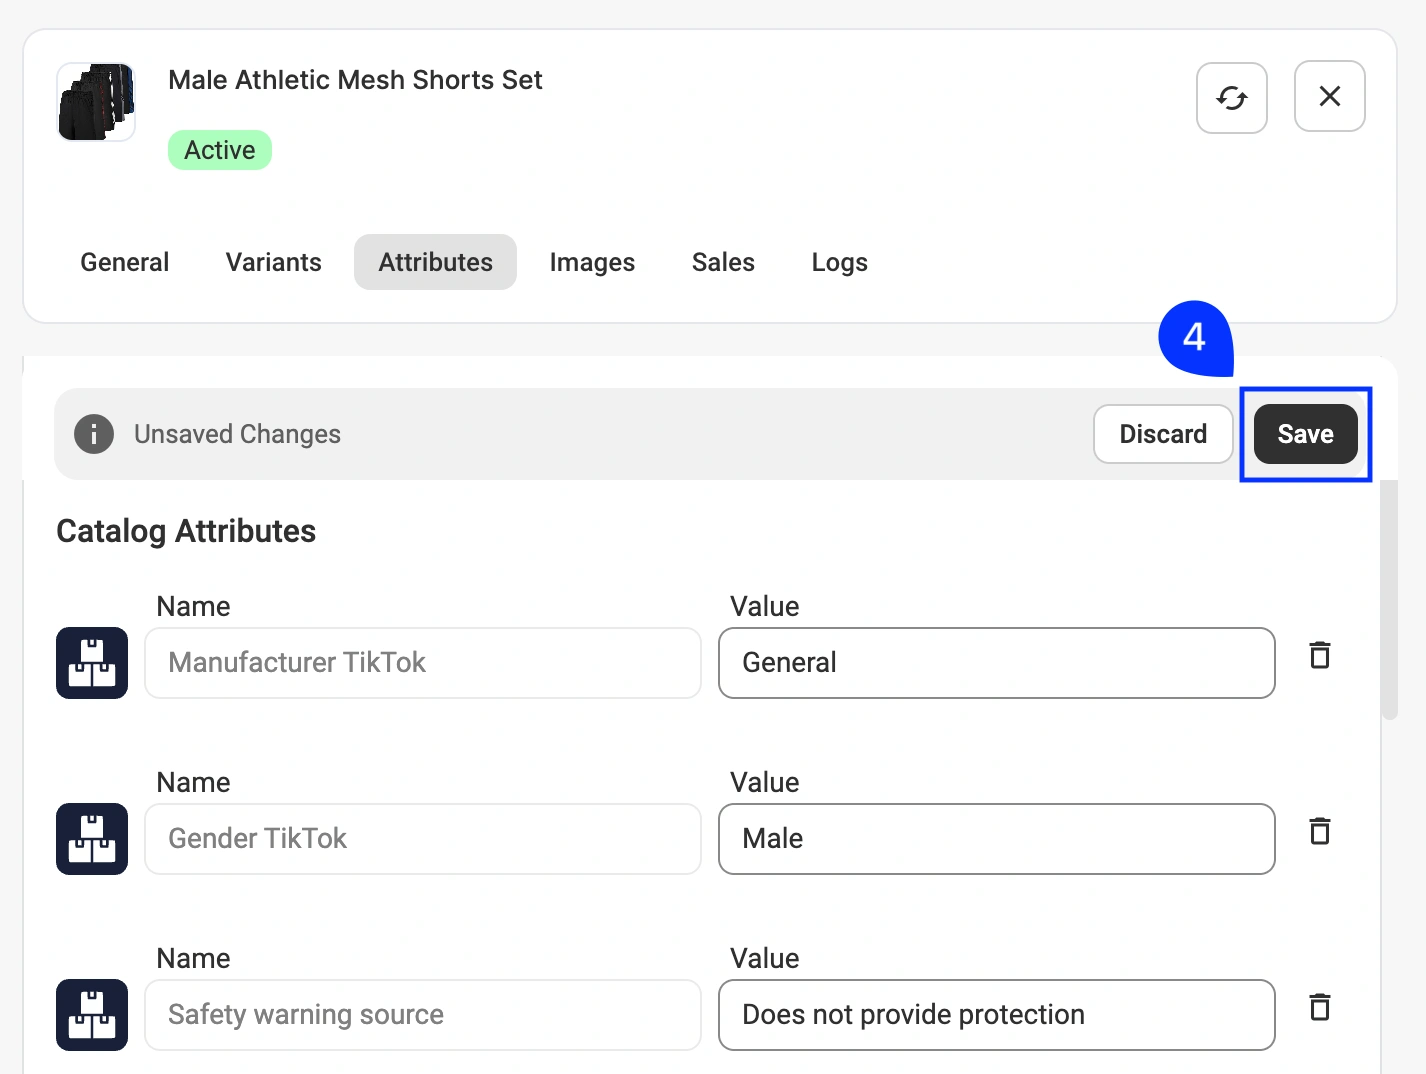
Method 1. From the product card #
This method is suitable when you have already set a default value but need to adjust it for individual products.
1) On the Catalog page, click the product card.
2) Open the Attributes tab.
3) In the Catalog Attributes section, find the custom attribute(s) and enter the relevant value.
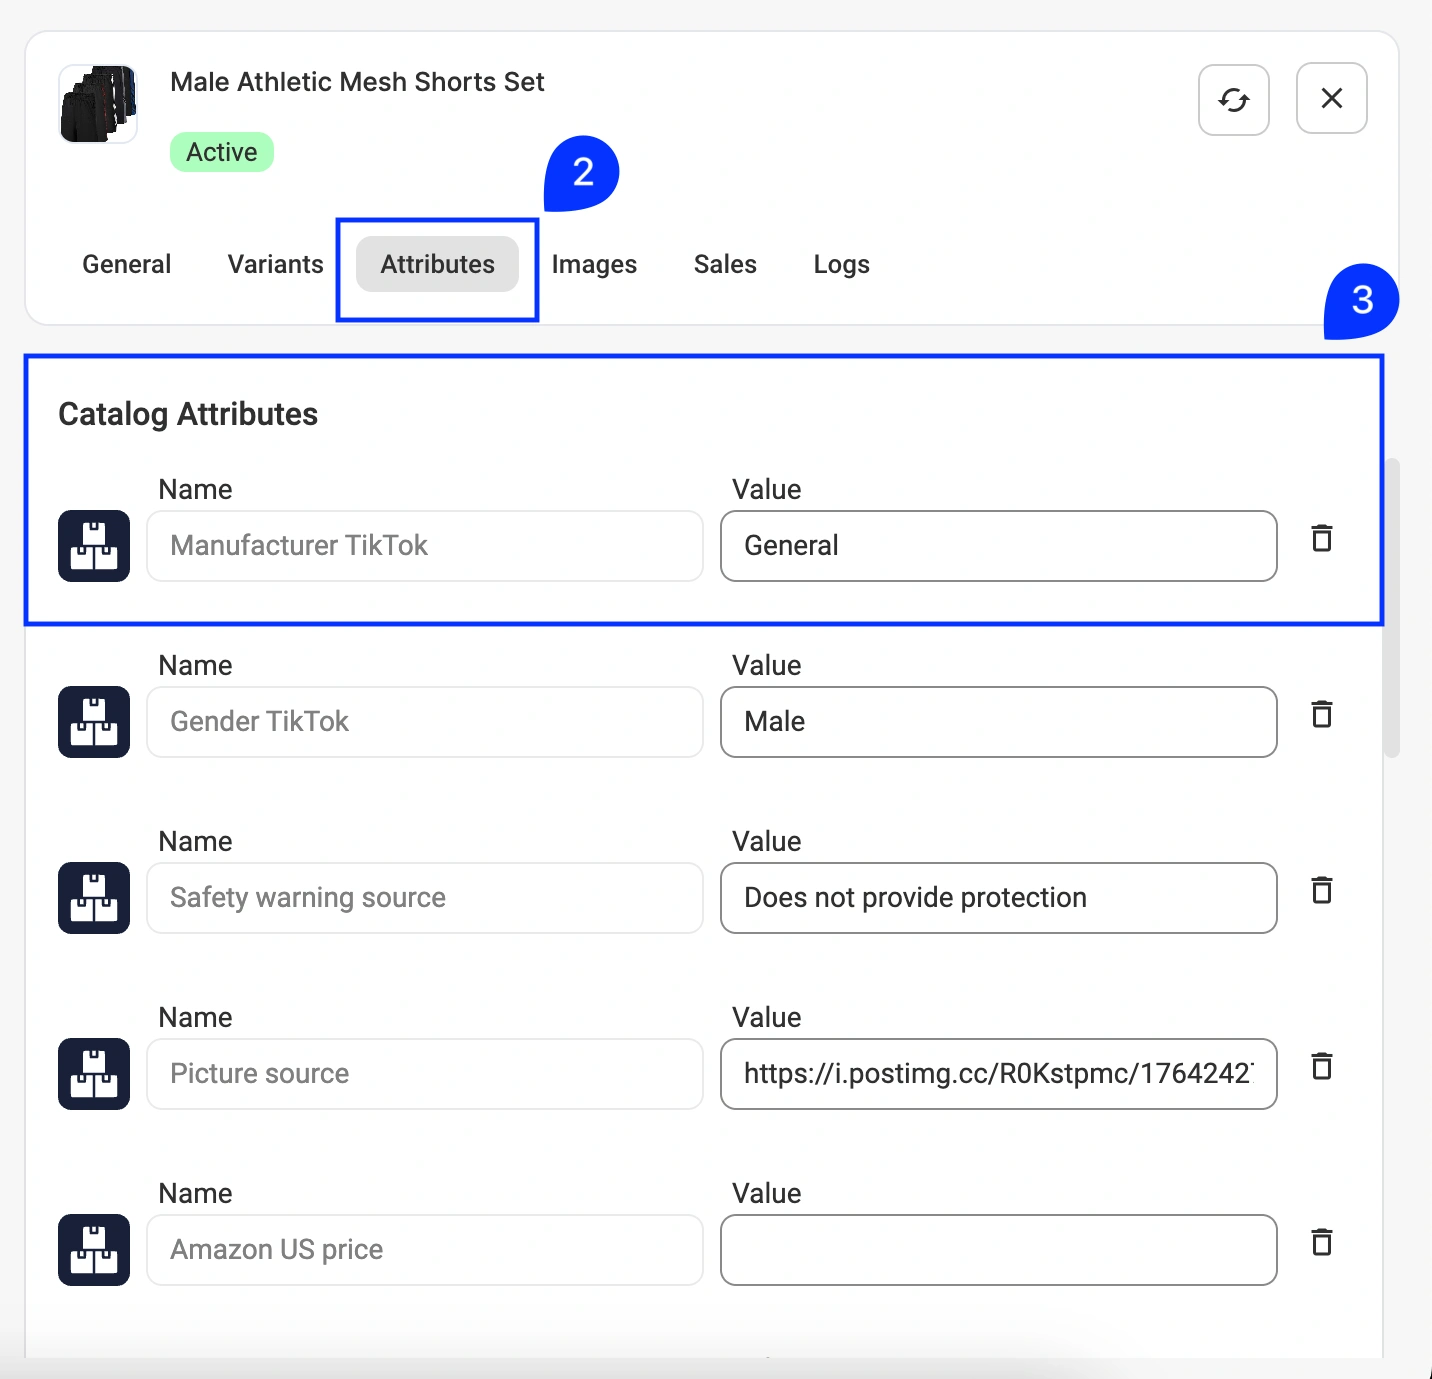
4) Click Save.
Method 2. Via mass actions #
Use this option to assign or update values for multiple products at once.
1) On the Catalog page, find the required products using search, groups, and filters.
2) Select the products by checking the boxes next to them.

3) From the mass actions menu, click Add Value to Custom Attribute.
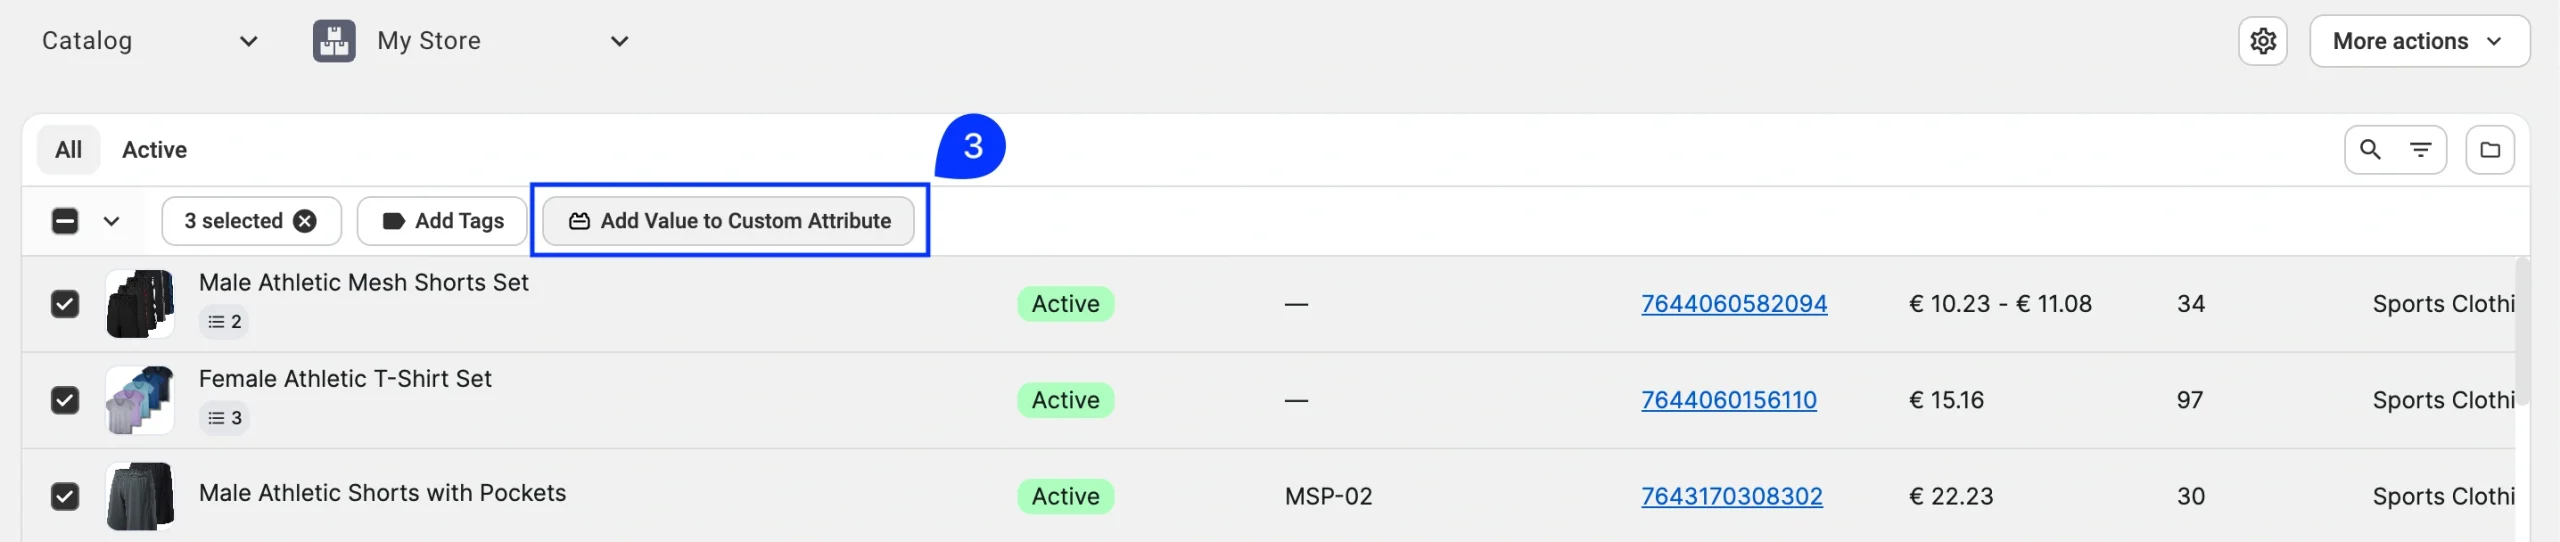
4) In the Name field, select the required custom attribute.
5) In the Value field, enter the value to assign.
6) Click Save.

Click Add Custom Attribute if you need to assign values to multiple attributes in one action:

ℹ️ In parent-child mode, the custom attribute value is assigned at the parent product level. If you are using inventory mode, the value is assigned to each selected variation.
Method 3. Bulk assignment via CSV export/import #
This method is recommended for large catalogs or for frequent attribute-value updates.
Step 1. Export products #
1) On the Catalog page, filter and select the needed products.
2) Click More Actions > Export in the top-right corner.

3) Choose Custom Attributes as the export type.
4) In the Editable Fields section, select the custom attribute(s) you previously created (for example, Quantity Per Pack).
5) Click Export.

Step 2. Fill in attribute values #
Open the exported CSV file and enter values in the custom attribute column.
For Simple products, assign the value to the product row.

For Variational products, assign values only to each variation, not to the Parent product.

⚠️ Do not modify the product identifier columns (SKU, Store Catalog ID) in the CSV file. They are used to match products during import.
Step 3. Import updated values #
1) Return to the Catalog tab.
2) Click More Actions > Import in the top-right corner.

3) Upload the updated CSV file.
That’s it! Your custom attribute values are now assigned and ready to use. You can set these attributes as a source of product information when creating listings on marketplaces in M2E Multichannel Connect.
Manage existing custom attributes #
You can view, edit, or delete custom attributes at any time:
1) Go to the Catalog page.
2) Click Settings (gear icon) > Custom Attributes.

3) From here, you can modify attribute names, change default values, or remove attributes.

Changes will automatically apply to your Catalog products.
When saving changes to existing attributes, make sure to click Save and Close. If you click Save and Create New, a duplicate attribute will be created.
✅ If you manage custom attributes via CSV, re-export your file after changing attribute values or names.
ℹ️ Deleting a custom attribute will remove it from all products in your Catalog.
Need help? #
If you have questions about using M2E Catalog custom attributes or need assistance, contact the M2E support team.


