This guide explains how to list products from your Store or Catalog on OTTO Market using M2E Multichannel Connect.
ℹ️ Before you start, make sure that:
- Your OTTO seller account and Store account are connected in the app.- The M2E Multichannel Connect app is installed in your e-commerce platform.
Step 1. Access OTTO items #
Go to the Listings page of M2E Multichannel Connect and choose the OTTO account where you want to publish new products.
Click List on OTTO in the upper-right corner to begin creating your OTTO listings.

Step 2. Configure Policies for new listings #
Define the M2E Policies that control how your products will be listed and updated on OTTO:
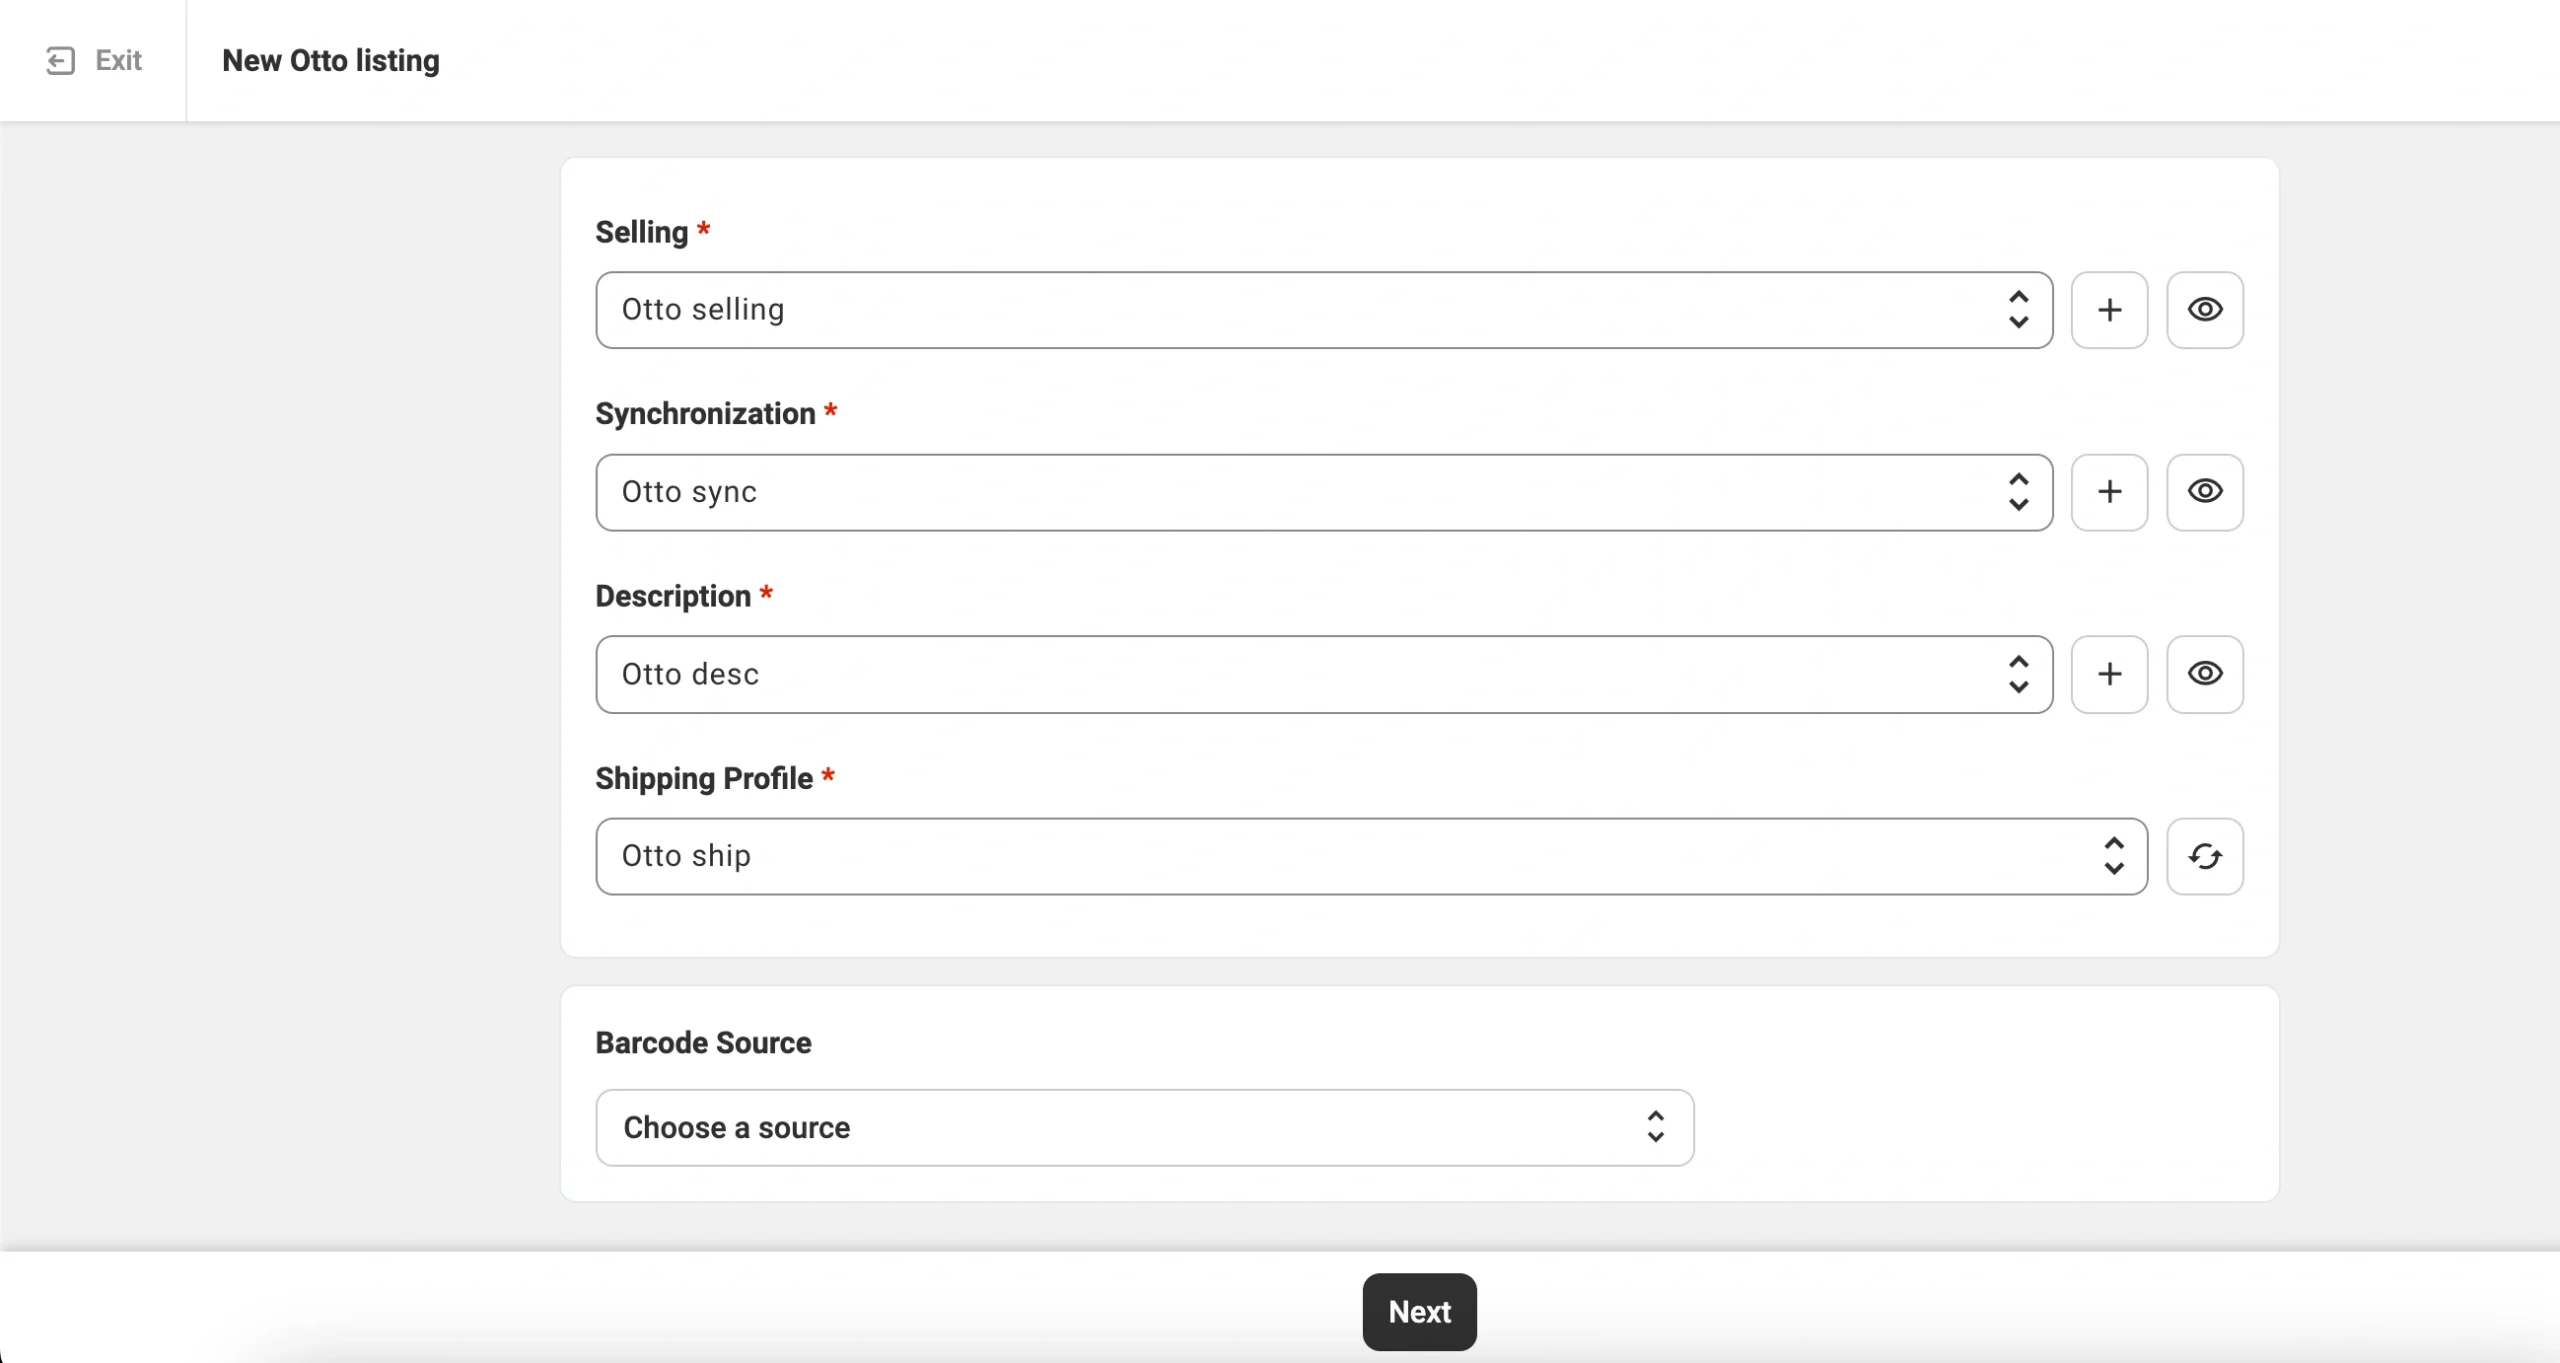
- Selling Policy – Determines the price and quantity that the app will use when listing your products. Depending on your setup, you can use your Store's pricing, define OTTO-specific adjustments, or specify a fixed quantity.
- Synchronization Policy – Defines how the app updates your OTTO listings when product data changes in your Store or Catalog.
- Description Policy – Specifies which product titles and descriptions should be sent to OTTO. You can reuse Store data or configure marketplace-specific text through Advanced Description.
- Shipping Profile – Select an existing shipping profile imported from the OTTO Seller Portal or click Create New to set up a new one. These profiles define the delivery conditions for your products, including shipping methods, costs, and other details.
Once you’ve defined the Policies, you need to provide the Barcode Source.
By default, M2E will use the barcode available in your Store’s product data. But you can assign any other Store/Catalog attribute containing the GTIN/EAN or provide the value manually.
ℹ️ OTTO requires a valid product identifier to ensure customers receive exactly the item they ordered, with the correct model, size, or color.
Step 3. Select products to publish on OTTO #
Choose the products from your Store or Catalog that you want to list on OTTO Market. Use the search bar and filters to locate products by title, SKU, category, or Store attributes.

If you are listing a large number of items, it is recommended to work in batches (for example, by Store category or product type). This approach helps you apply consistent Policy settings and attribute values.

Once you have selected your products, proceed to the next step.
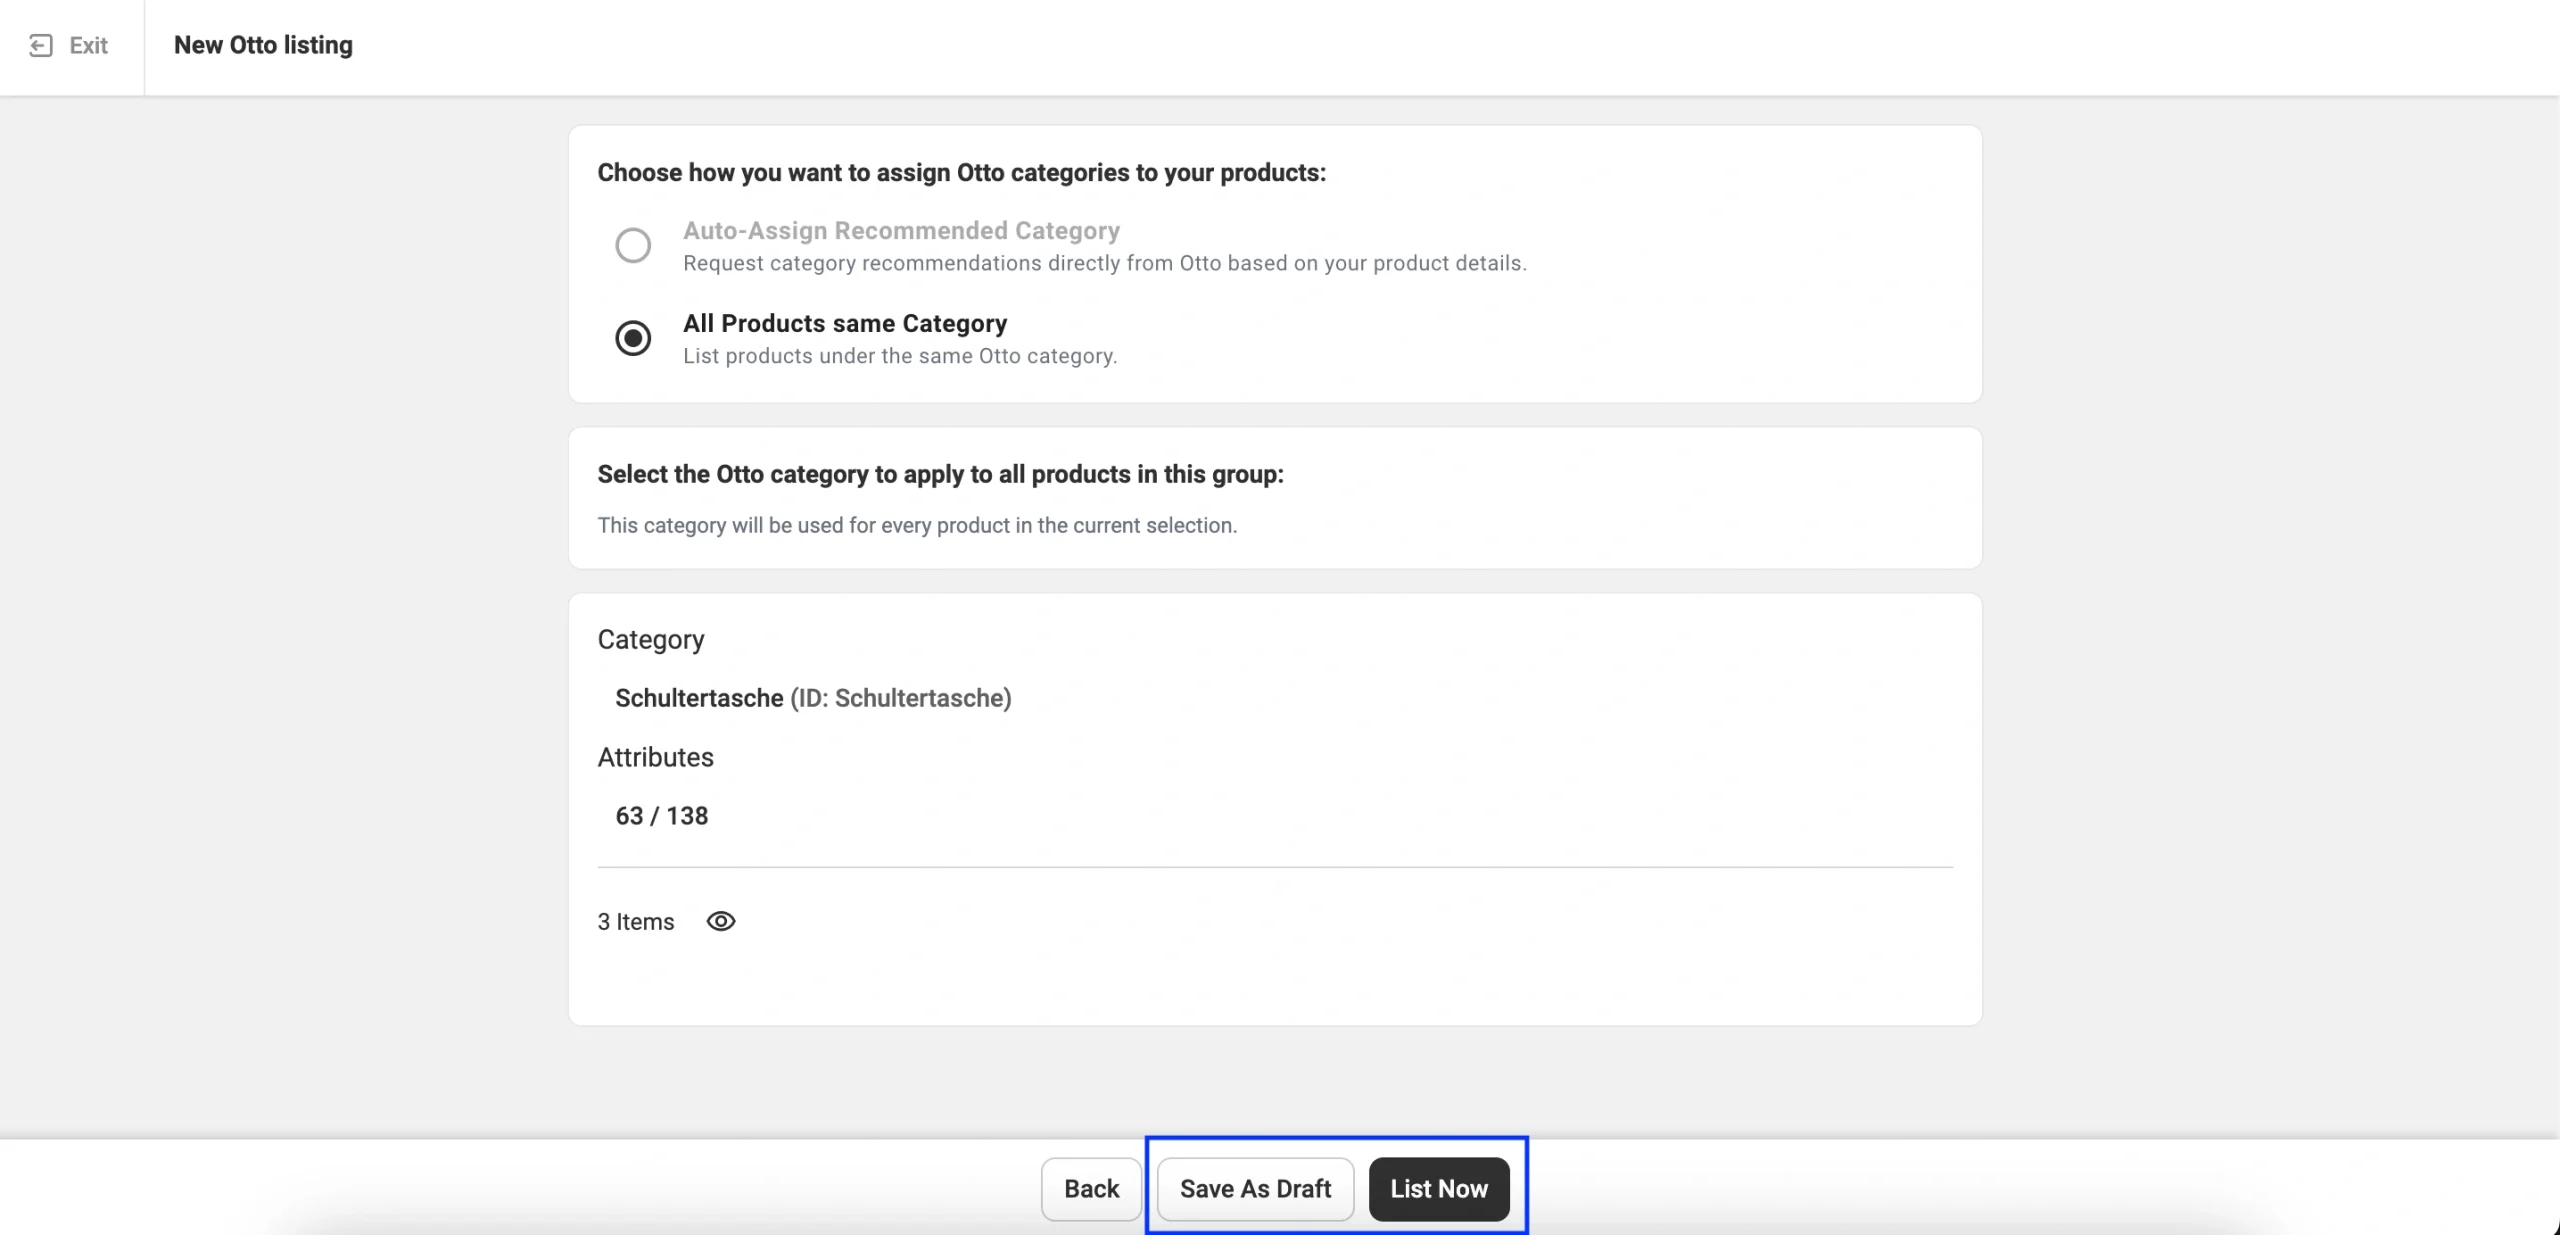
Step 4. Assign an OTTO category #
Every product must be placed in the correct OTTO category. Choose how to assign categories to the selected products:

Option 1. Auto-assign recommended category (coming soon)
Click Get recommended categories to request a category suggestion from OTTO based on your product data.
When a suggestion appears in the purple box:
- Click the checkmark to accept it, or
- Click the pencil icon to edit and choose another category manually.
Option 2. All products same category
Choose one Otto category and apply it to all selected products. This option works best when the selected products belong to the same type or Store category.
You can find the category by searching with keywords or by browsing the category tree.

Step 5. Set category attributes #
After selecting a category, you need to fill in the related attributes. OTTO uses these attributes to correctly classify your products and display them to buyers. Some attributes are required, while others are optional but recommended for better visibility.
You can provide the attribute values in several ways:
- Select from OTTO’s predefined attribute options
- Assign existing attributes from your Store or Catalog
- Creating additional attributes in the M2E Catalog if the needed data is missing

ℹ️ When filling in the category attributes, make sure to select the correct Brand value. This information will be used when submitting GPSR details to OTTO.
Once all attribute values are set, confirm your choices.
Step 6. Publish or save your listings #
After all configurations are complete, you can either:
- List Now to submit your products to OTTO, or
- Save as Draft and return to them later.
ℹ️ Listings in Draft status are stored in the app and will not appear on OTTO until you publish them. Products in your Store with a Draft or Hidden status will not sync to OTTO.
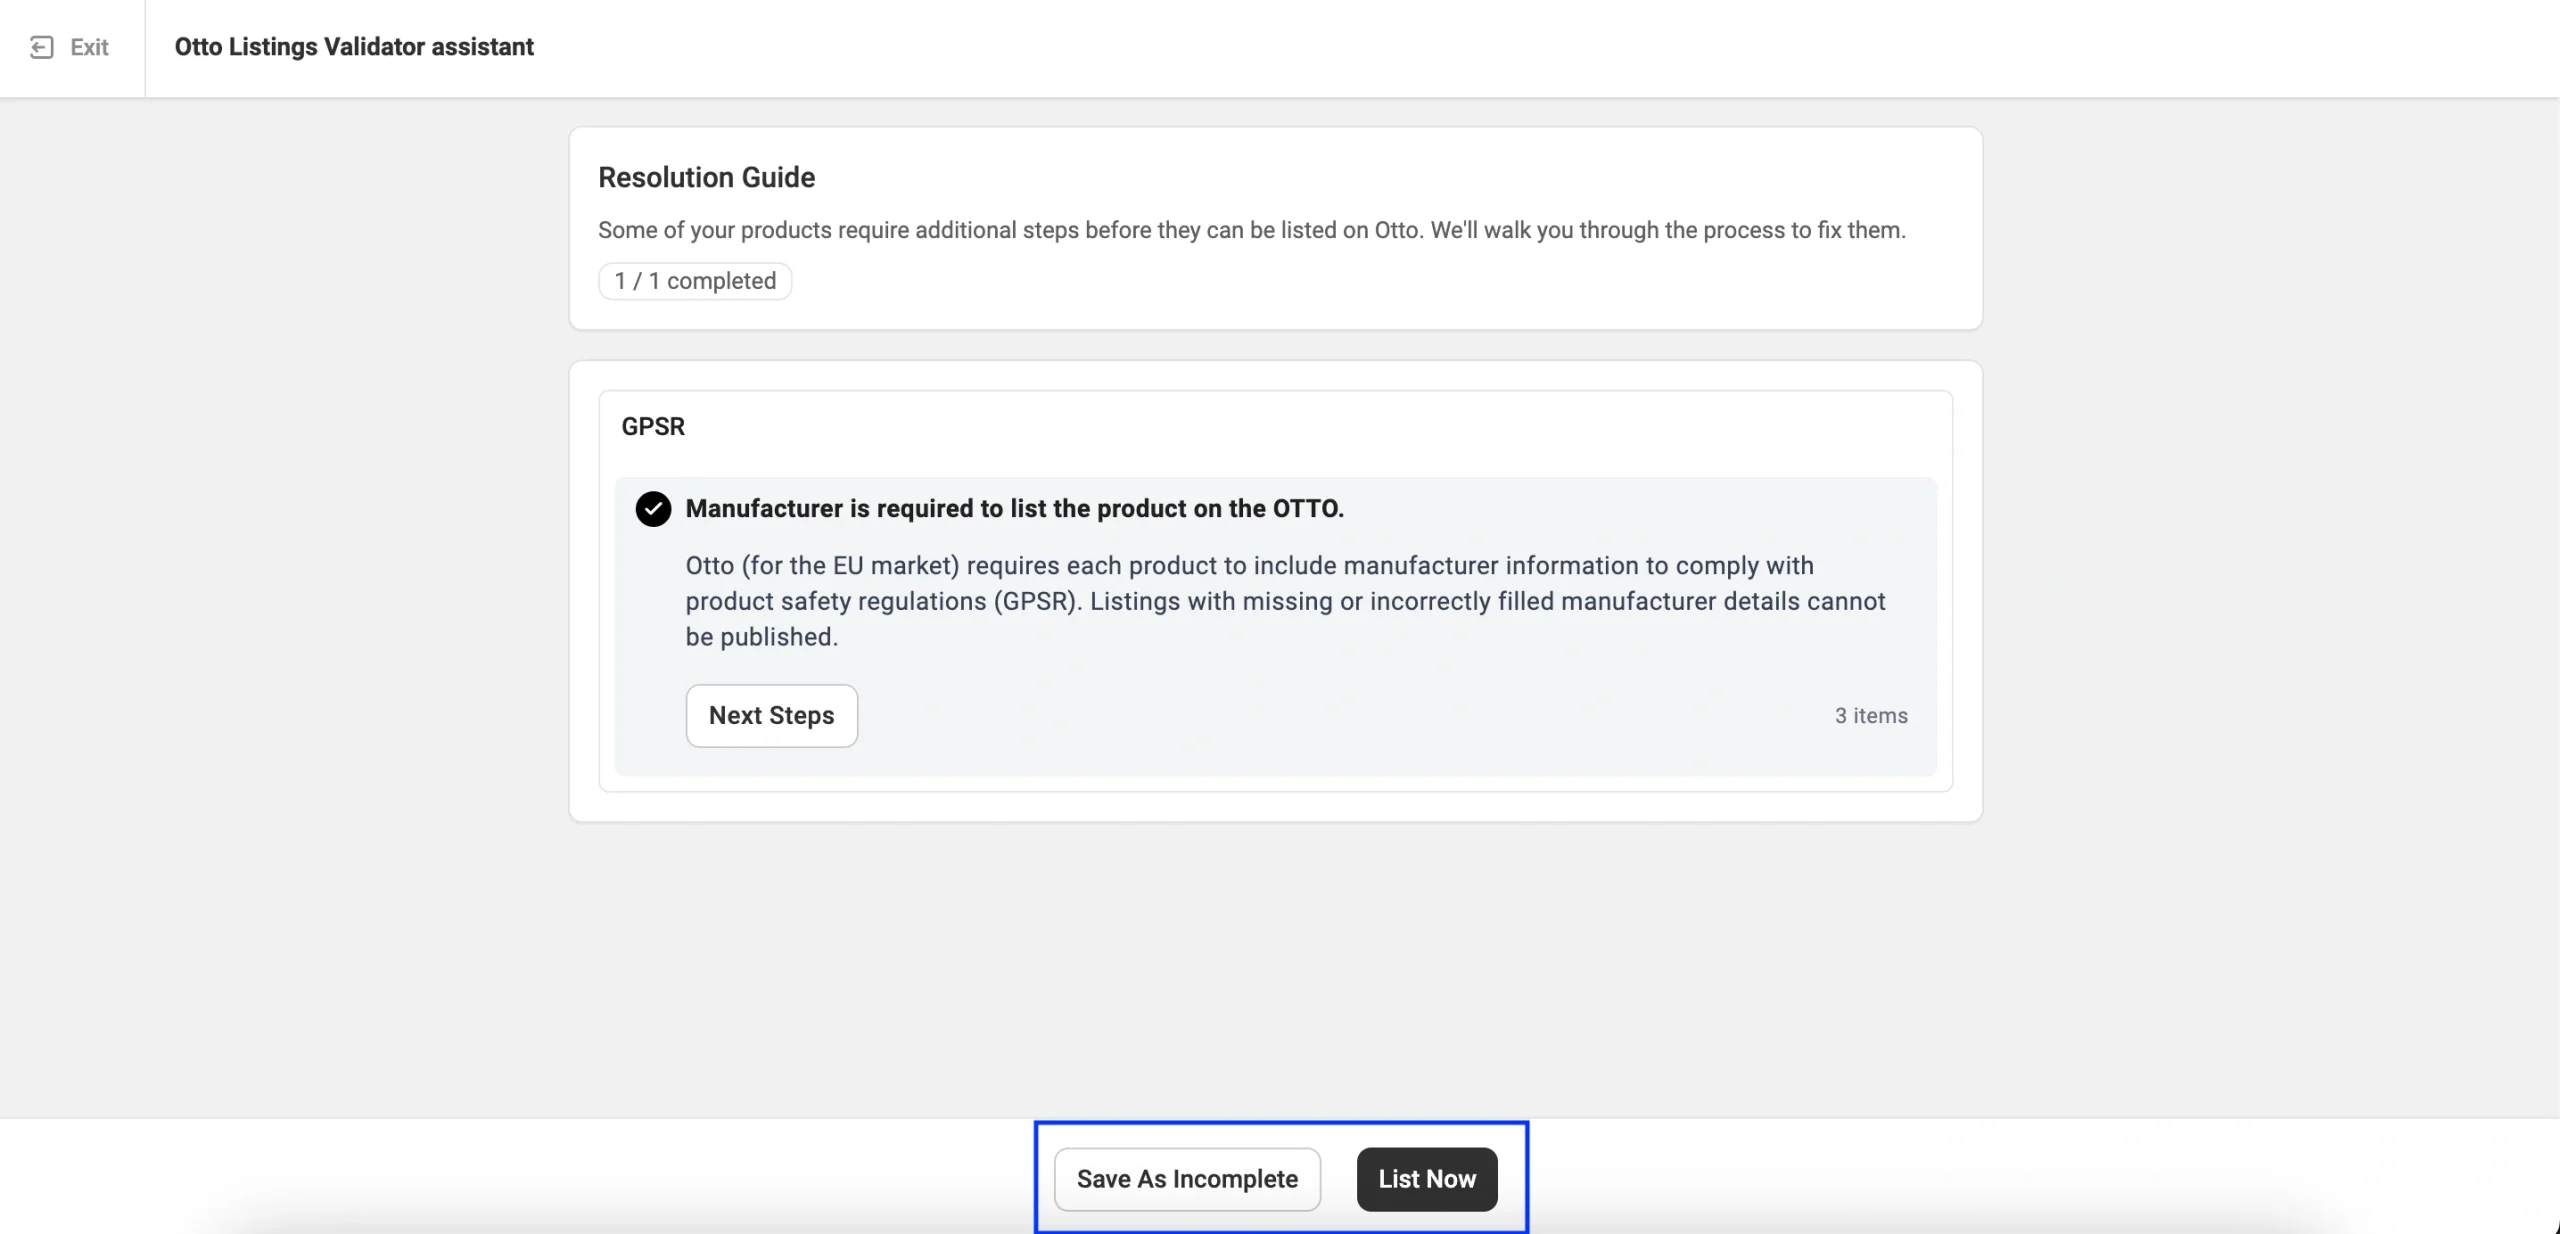
Step 7. Validate the listing data #
Before submitting the items to OTTO Market, the M2E Listing Validator Assistant checks your items for missing or invalid information. For example, it will warn you about empty attributes, GPSR-required details, or data that does not meet OTTO’s standards.
If issues are detected, they will appear in a list with instructions on how to correct them. You can resolve the issues immediately and click List Now, or save the items as Incomplete and return to them later.
✅ If you experience issues while listing items on OTTO in M2E, please contact our support team.


