
M2E Multichannel Connect integrates Shopify with Amazon, helping you publish products, maintain accurate inventory and pricing, and bring Amazon orders into Shopify for fulfillment.
Follow the steps below to connect your Shopify store to Amazon and complete the initial setup.
Step 1. Install M2E Multichannel Connect #
- Navigate to the M2E Multichannel Connect page in the Shopify App Store.
- Click Install to begin the installation.
- Shopify will display the permissions required by the application. Approve them to continue.
- Once the installation is complete, launch the app from your Shopify admin panel.

Step 2. Connect your Amazon seller account #
Shopify serves as the primary source of product data. The next step is to authorize access to your Amazon seller account.
- Open the Dashboard in M2E Multichannel Connect.
- Click Connect Marketplace Account.
- Select the Amazon region associated with your seller account and click Connect.
- Sign in to your Amazon seller account if required and approve the authorization request.
- After authorization, you will be returned to the app, where the account will appear as connected.
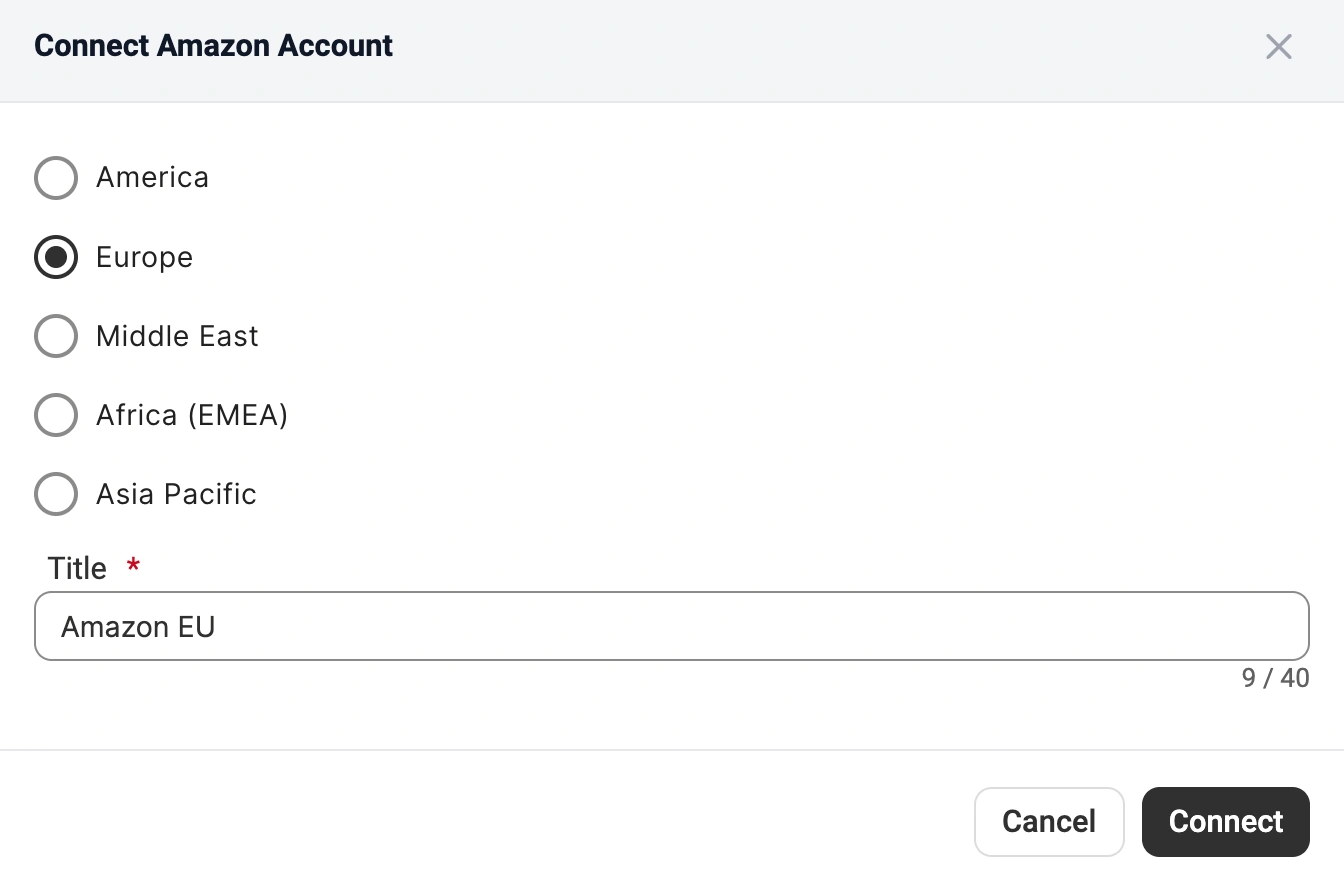
ℹ️ Each Amazon connection supports a single marketplace region. If you sell in multiple Amazon regions, you'll need to connect each account separately.
✅ Don't have an Amazon seller account yet? Get started here – you'll get a 30-day free trial of M2E and personalized onboarding.
Once your Amazon account is connected, the Setup Guide will automatically open and walk you through the remaining configuration steps.
Step 3. Link Shopify products and Amazon listings #
If you already sell on Amazon, M2E automatically imports your existing Amazon listings and attempts to match them with Shopify products using SKU or Product ID.
Products that cannot be matched automatically must be linked manually:
- In the Link Products step of the Setup Guide, click View Not Linked Products.
- Review the list of unmatched Amazon listings.
- Link products individually or perform bulk linking using CSV export and import.

⚠️ Only linked products can participate in inventory and order synchronization, so make sure all active Amazon listings are matched.
Step 4. Enable inventory synchronization #
With the products linked, the next step is to turn on synchronization so Amazon reflects the latest stock and product updates from Shopify.
When synchronization is active, changes made in Shopify are automatically sent to Amazon.
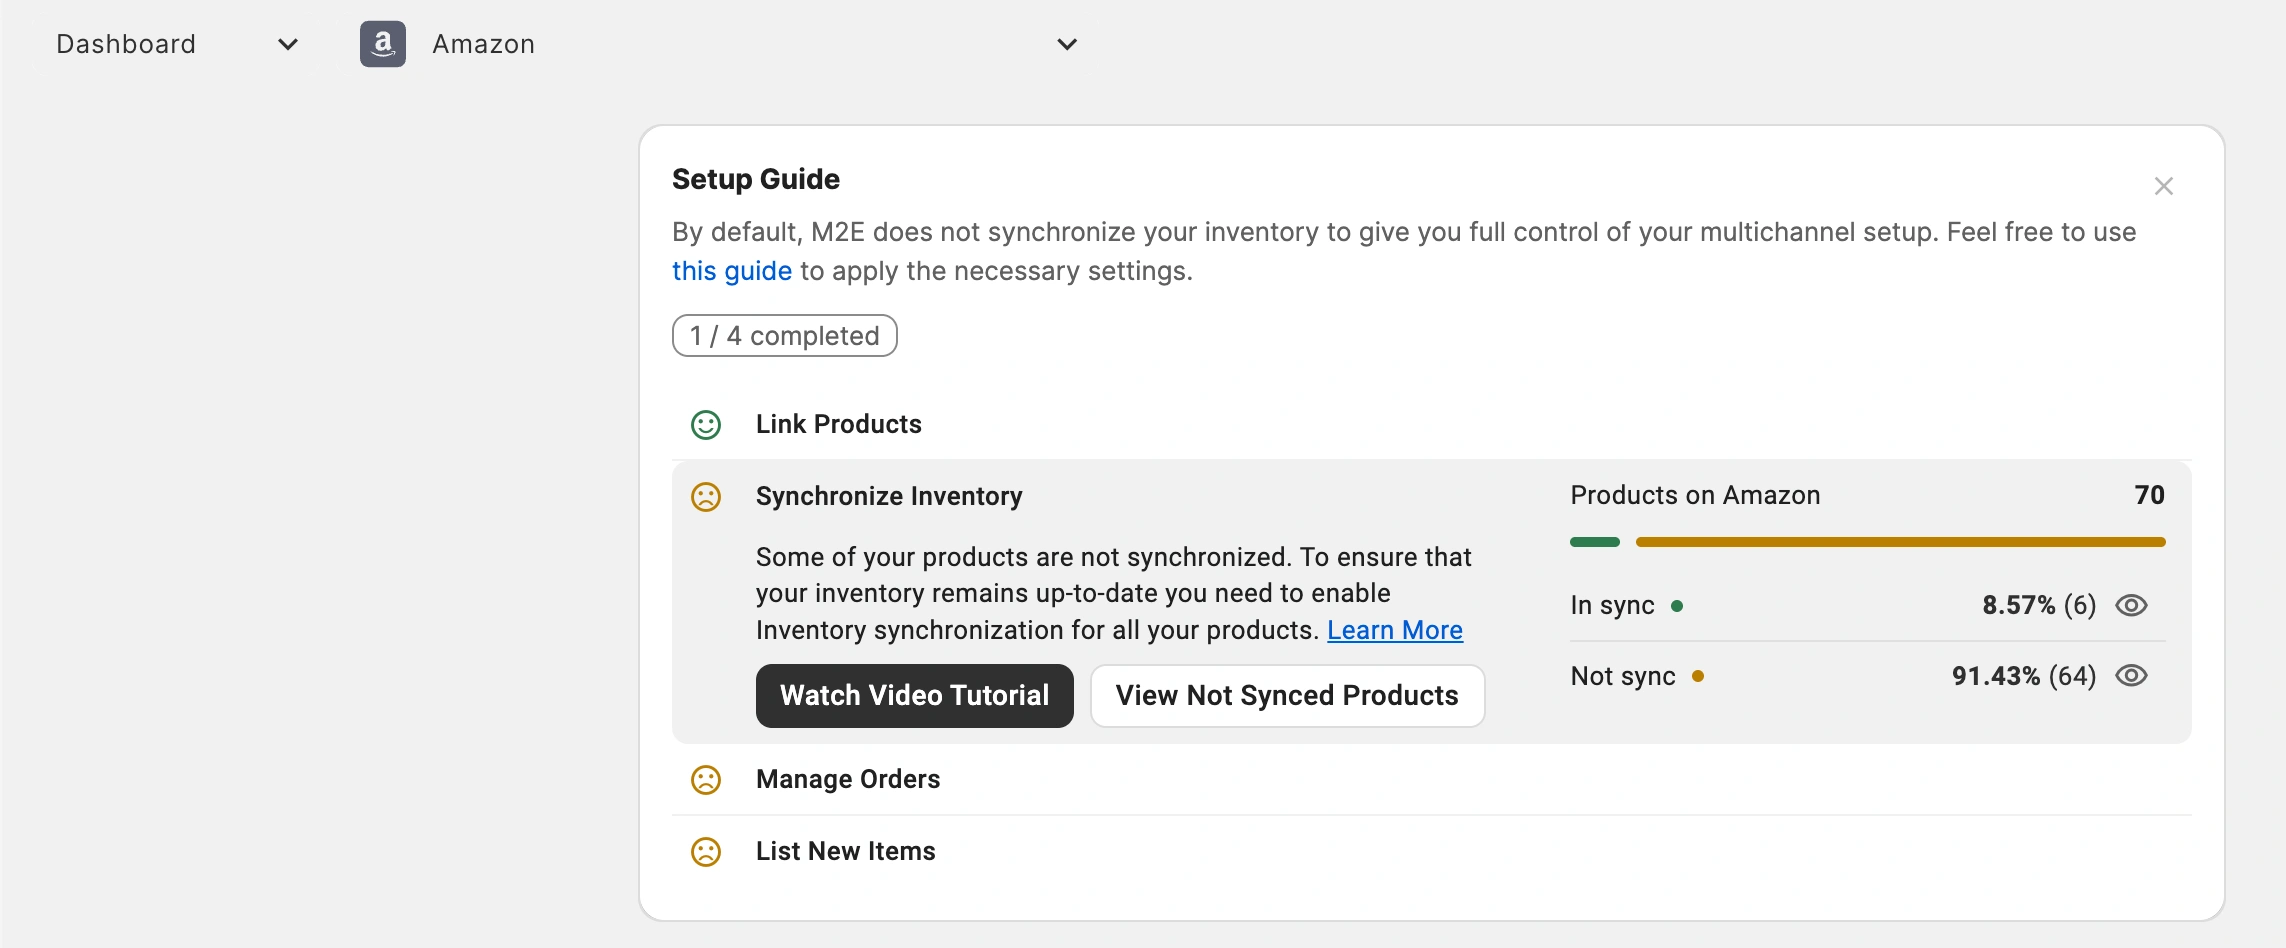
- Open the Synchronize Inventory step in the Setup Guide.
- Click View Not Synced Products.
- Choose the linked products you want to synchronize and enable syncing from the mass actions menu. Refer to the inventory synchronization guide for step-by-step instructions.
Step 5. Configure order management #
Order management controls whether Amazon orders are imported into Shopify.
- In the Setup Guide, open Order Settings under Manage Orders.
- Enable Create Amazon orders in Shopify.
- Select the date from which Amazon orders should start being imported.

When enabled, M2E creates a corresponding Shopify order for every Amazon sale, so you can manage fulfillment from your Shopify admin.
If order creation is disabled, Amazon sales won’t reduce Shopify inventory levels, which increases the risk of overselling.

ℹ️ After enabling order creation, you can configure additional settings to control how Amazon orders are created and managed in Shopify.
Step 6. Publish Shopify products on Amazon #
If you have products in Shopify that aren’t yet available on Amazon, you can create Amazon listings using M2E Multichannel Connect:
- In the Setup Guide, locate the List New Items section.
- Click List on Amazon.
- Follow the listing wizard to select Shopify products and submit them to Amazon.
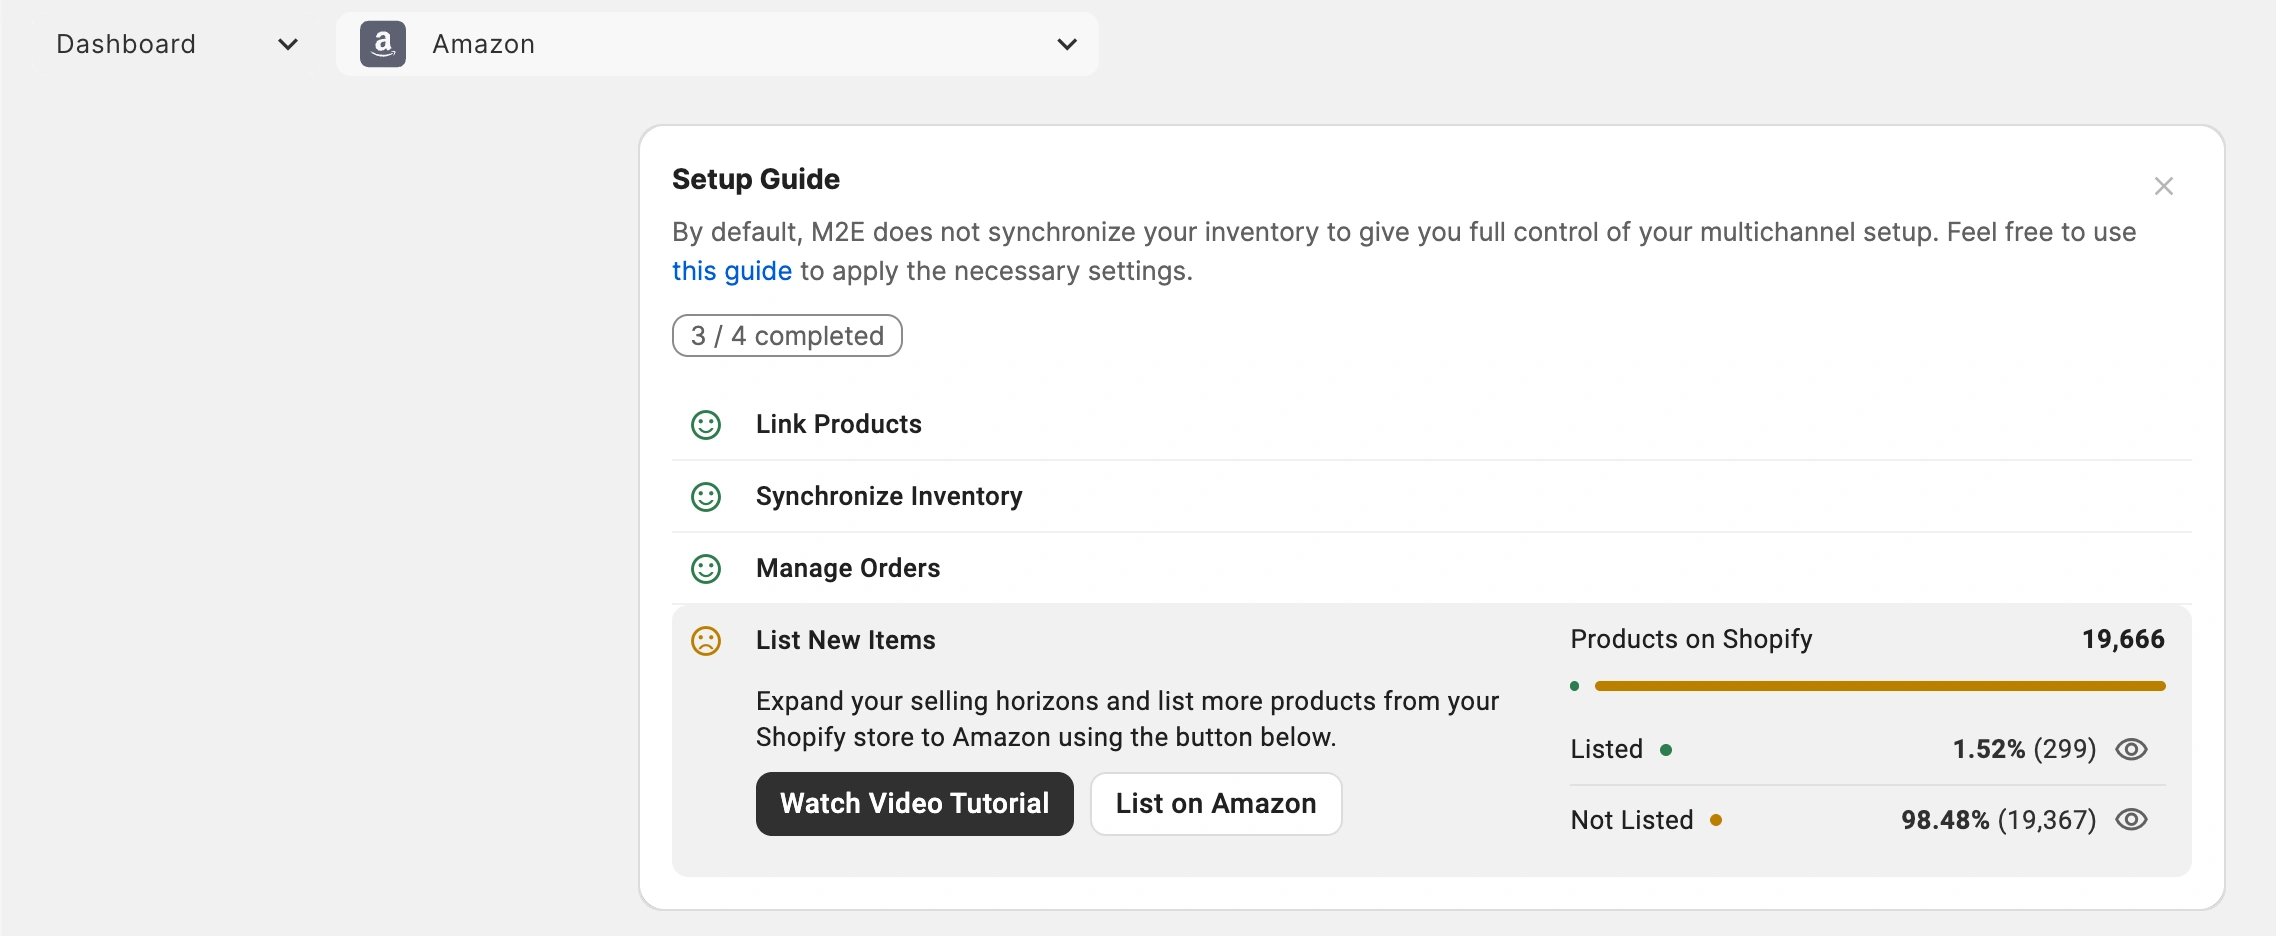
Once submitted, Amazon will process your listings according to its marketplace requirements.
Need help? #
If you have questions about connecting Shopify and Amazon or configuring M2E Multichannel Connect, contact our support team.


